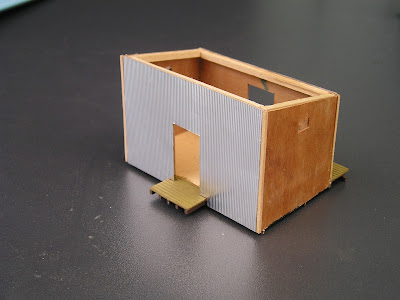
Tumbarumba Goods Shed - Take 2
Shortly after I had finished my construction of a goods shed for Tumbarumba around 3 years ago, it was correctly pointed out that I had made a big goof - I had used the wrong kit. I had used a Bergs G1b kit, but I should have used the smaller G1a kit.
One of the reasons for writing this blog, was for information exchange. And I have been rewarded with contacts from knowledgable people, a large number of photographs. Fortunately, there have been a few published in the "Tumba Rail" booklets, although images on the internet are rare.
 |
| Still my only picture of the goods shed - I took this one in 1980. |
The goods shed I had made (described on the earlier blog-post),
https://buildingwagga.blogspot.com/2017/09/tumbarumba-goods-shed.html
was not right, so in some ways, I welcomed the opportunity to make a new shed
The new build
A few months after realising my mistake, I acquired a Bergs G1a goods shed from ebay, and made a start on construction.
The techniques are similar to the ones used on the original build, although I did use a micromark magnetic clamp system for the basic shed.
However, my desire was to make new models, and the partially made kit was placed into a plastic storage tray, and moved to one side.
A long time (a few years) later
Whilst I should be powering ahead with Wagga station, I was getting far too many interuptions for a concerted effort to complete (read kitten, gardening, lawn mowing, etc), the goods shed was something smaller, and taking up space on the workbench - mocking me to complete.
So, its time had come.
The build resumes
All of the metal corrugated sheets were attached to the wood the same way
 |
| A suitable weight on top of the foam block plus gravity is all the force needed |
 |
| After the glue had dried, the metal roof is secure |
One of subtle differences in the two sheds, was the supports. The bergs kit assumes wooden piers, the Tumbarumba shed actually has brick piers. I had made brick piers before for the Ladysmith goods shed - by wrapping superquick brick papers around square wooden pegs. This time, try a new technique.
 |
| I cut a strip from the Slaters brick sheet styrene |
 |
| Positioning the evergreen pier on the back of the slaters styrene strip shows me the material I have to bevel. |
 |
| The pieces needed to make just one pier |
 |
| The as yet unfinised shed on the base to test the positioning of the steps (held in position with a dab of blue-tac). It will later be secured with styrene cement |
Finishing
 |
| Downpipe made from sytrene rod, cut and reglued to get the angles. Secured to the wall with white glue |
I have had a lot of fun finishing this model. I tried out some new techniques, and happy with the end result. Whilst, I may now prefer to build in just styrene, rather than a composite materials, it is good to not loose those skills.
Conclusion
Looking around my workbench, I note quite a number of unfinished projects - (eg. silo for Ladysmith, water tank for Borambola, lamp building for Bomen, DJH D50), and as a new years resloution, finishing these will be the goal. I will let you know how I go via the blog.
And finally, a couple of extra pictures.
*
 |
| Bomen lever frame - under construction, by Tony, of Mackenzie in HOland. Tony visited me last week to show off his progress. |


Rob, I thought I posted this yesterday but I must have not pressed go for the 10th time! You seem to be happy with your little table saw. Would you recommend it for say cutting Lima Sides etc.? I have been looking for a similar saw but the Proxxon ones are a bit pricey. Interested in your thoughts. Cheers Phil
ReplyDeleteHello Phil, I watched a you-tube video from "Garratt Maker", where he used a small table saw to cut brass sheets - which is what I plan to use it for. Using this saw for styrene was an experiment for me. What concerned me was the speed of the saw blade is fixed, and I was concerned that it would have generated heat, enough to melt the styrene. The evergreen styrene strip cut fine, leaving just a burr that easily broke off. How it would go with cutting a sheet of styrene is unknown - so unfortunately I can't recommend it for cutting your Lima carriage sides. It could work fine.
DeleteThanks Rob.
ReplyDelete