Sunday 30 December 2018

Kyeamba Bridge diorama fascia


A short update this time – the holiday season makes a mockery of my time management, and coupled with a week of unseasonal 40+  degree temperatures, and biting “stable” flies, https://en.wikipedia.org/wiki/Stable_fly
has limited the time I have been able to spend in the garage.    So, I have about an hour, prior to 9am about every other day.


3801, doing a run-around move, approaches the Best Street road overbridge

 
The Wagga station footbridge is a keen location for train spotting.  3801 has left part of her train of what remained of the Wagga sidings after CTC was introduced.  These pictures were taken in the 1990s.  A steam tour train is rare in Wagga, but a special event will add much interest to my future operation sessions, as well as giving me an excuse to run models that do not fit the 1970 timetable running period 


The Kyeamba Creek diorama will eventually be located on the layout’s upper deck, immediately coming off the helix.  As I have mentioned before, my intention is to limit the width of the upper deck to the area essentially within the railway boundary fences.  Coupled with the increased viewing height, the lack of layout width will be less evident.  But I couldn’t avoid the need of a fascia board.
Besides covering up all the white foam, the fascia needed to be deep enough to hide the layout supports, any underneath wiring, and a series of lights, which will hopefully eliminate the shadows on the lower deck
The first step was to make a cardboard template of the topology on the layout edge.  I did this with some thin cardboard, and a graphite pencil.  Cutting the template out with scissors, and transferring the resultant shape to my 3mm MDF.    A jig saw makes short work of the MDF. 

Cardboard template after cutting


Fitting the MDF to the timber base showed up areas of protruding white foam, which was removed with saw, and sander.  The MDF was then attached to the diorama with wood screws.  A further check showed areas where the fascia top needed some fine tuning with the jig saw.

As my MDF sheet was 600 mm long, I needed two sections of fascia.  Yes, poor woodworking has also introduced a gap between both sections – filler, and paint will fix this once the diorama is installed.   Note, I have NOT done a fascia board for the rear – this side won’t be seen, and the backdrop will go there.

Fascia board screwed onto the diorama.  It extends lower down so the workbench woodwork is covered


Whilst Junee is quite a dry climate, I need to paint the fascia before too long to stop it warping over the 20 year anticipated life of the layout.  I probably should have done this before cutting it to shape, but I am a bit impatient.  But what colour should I paint it?  I have seen some nice green facias, but I think a buff colour might be more suited.  The research continues.


Some extra scenery work has been performed on the unnamed creek bed.  Some 10mm long static grass has been applied (poorly – I am a beginner with this technique), and a quantity of sand added.  Plus a few branches littering the creek bed  from an earlier storm event   Soaked down with PVA glue/water/isopropanol .    It isn’t quite the effect I was hoping for,  but a good base for more tinkering. 
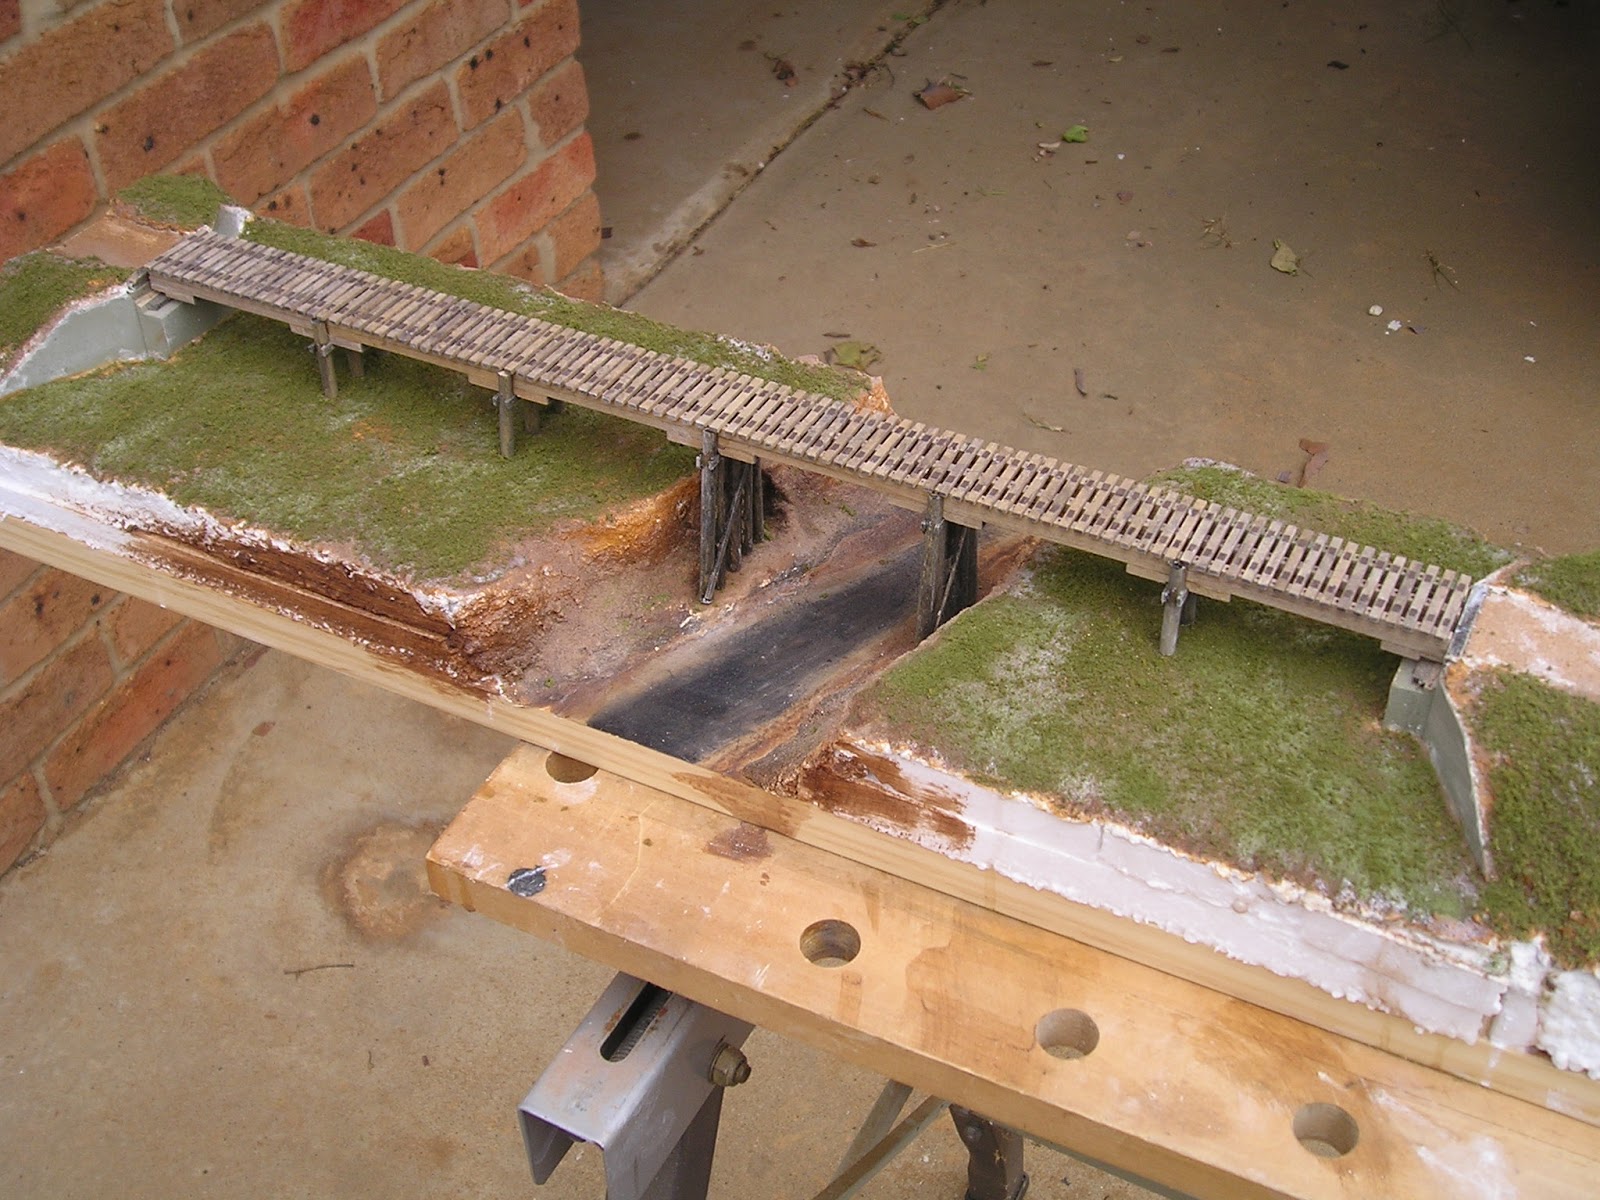
The unnamed creek bed no longer looks like a road, but there is a bit too much grass showing through, and I didn't get the sand drift colour that I hoped I would.  May be only a matter of another dusting of sand over the creekbed?  A bit more ground foam has been added to the banks too.   I am really close to permanently installing the bridge. 


All the best for the new year.

Tuesday 11 December 2018

Kyeamba Creek - Scenery 1


Kyeamba Creek Bridge – Scenery

Trying something new could be the title of this post.  Finally made a start on the scenery.


Unnamed creek bridge on its new piers

Unnamed creek bridge floats above the baseboard between its pair of timber abutments  


Timber blocks added to support the bridge piers

 
Polystyrene fitted to the unnamed creek bridge area.  Note the abundance of foam for the embankments
First layer of foam for the main creek trestle.  The embankment foam has been cut, and roughly shaped in this view.

I used white polystyrene, primarily because I had it on hand.  It is not the most pleasant of material to work with.  Hot wire cutters could be used to cut and shape the foam, but a knife, saw,  rasp, and sandpaper works too.  Ensure a  vacuum cleaner close at hand to collect the white beads

Unnamed creek bed after sanding.  My intention is to model this  as a dry sandy creek. 


Sculpt-it modelling “plaster” obtained from Office Works.  I had to order this product in, as Wagga’s Office Works does not stock it.  The “plaster” is mostly very fine plant fibre, mixed with dry glue, and possibly some clay.  If I had to say what the plant fibre was, I would guess it is powdered newspaper – anyone who pulped newspaper for the old K-Tel brickette press would have a fair idea of the feel of Sculpt-it once water is applied.  Water is added, and mixed to form either a thick porridge consistency, or with more water for a thick soup. 

Sculpt-it has a grey colour, is workable for around 30 minutes, and has the advantage of little mess (compared with plaster).  

 Once the sculpt-it has dried, I painted the surface with "raw sienna" artist tube paint.  The effect might be effective in a desert, but it is just the first pass.  The sandy creek bottom has been “zip textured” with is a sand coloured plaster sold 30 years ago, sold under the“Tuft” label.  The ZIP texture  technique has been superceded with ground foam, and more recently static grass, but it still has its uses

 Kyeamba Creek also received the "raw sienna" paint I also used some "burnt umber" for the banks of the creek, and black to represent the water.   What I didn’t show in this picture was that I goofed with the width of the creek, and my first attempt to reinstate the trestle bridge failed, as the banks were preventing the bridge pier to go down.  Another nice aspect of the sculpt-it, was once dampened, it is easy to carve – unlike plaster

Both bridges.  This is the side that won't be seen when they are installed in the layout


I have been a fan of Luke Towan’s scenery you-tube videos, and Luke likes to texture the ground surface with a combination of dry dirt, and tan grout.  I followed his recipe with the red decomposed granite that I had left over from the outdoor landscaping, and I ended up with a pleasant “topsoil” colour.  This was applied over diluted white glue that had been painted over the “raw sienna” painted surface.

The sifted dirt adds another layer of texture - the original paint is just peeking through


Finally some greenery – courtesy of some Faller ground foam.  Even just one colour brings things to life.  The foam was dusted onto diluted white glue that had been painted over the surface.  In my enthusiasm to take a picture, the glue had not quite dried.

Next steps are to fill the dry creek bed with some sand drifts to take away the roadway look, continue filling out the ground, and creek banks with more green, clean up and disguise any white bits showing, add an MDF side to hide the exposed foam, think about the water, plant lots of trees and bushes, and get the track down, and ballasted. 


I wish all a happy, and safe Christmas.  May all your surprises be pleasant