The Bomen station was originally built by Charles Hardy of
Wagga, as part of the establishment of the terminus of the Main south line into
North Wagga Wagga. Charles was the owner
of a steam powered brickworks in Wagga Wagga, and he also built the Station
masters residence, the engine-shed, and other infrastructure.
 |
| S66 passes Bomen in June 1980. 44209 with a RUB set. Note the staff exchange stand, and hoop |
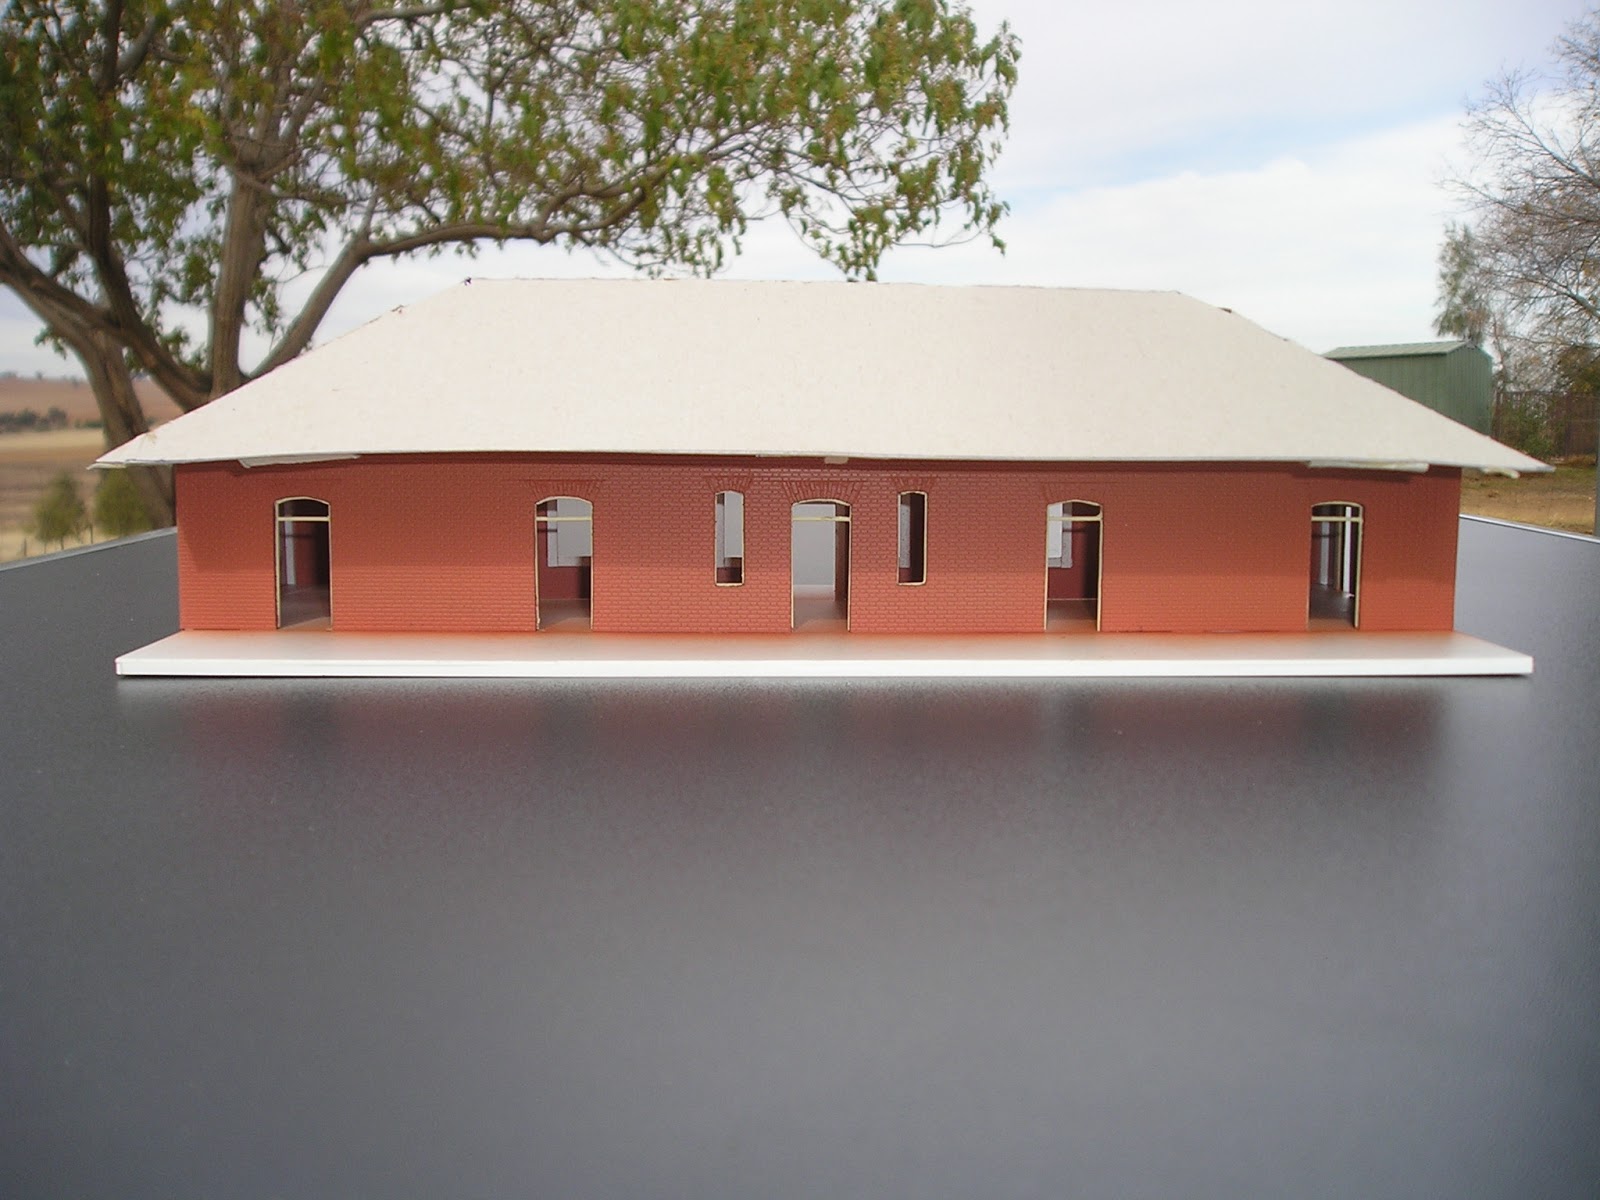
 |
| Station front a few years ago. |
 |
| Station rear |
According to notes I found at the Junee Roundhouse museum,
the plans Charles used were his own
This is a round-a-bout way of saying that it was unlikely
that a model kit would ever be offered of this station.
After I drew up the Bomen Station plans, I worked on other
projects whilst sourcing the styrene parts I would need.
 |
| Front and back views, with an marginally incorrect pitch on the roof. I drew the plans to 1:100, and then enlarged them to 1:87 on a photocopier. |
 |
| End views shows the fall of the ground away from the platform level. This fact has meant that my walls will have to extend below the platform, which slightly complicates the model build |
The first step was to make up a mockup out of
cardboard. This was mainly to test the
roof profile, as my plans were not as accurate as they should have been. Making a cardboard building is a useful
exercise, for it also gets me thinking about the project, and tests out a
possible construction sequence. A
better grade of cardboard would have been better than the cereal packet card I
used, and perhaps glueing on a copy of
my plans front and side elevations would have given a nicer visual result
 |
| Cardboard mockup, showing the rear of the station building. Took about an hour to construct. Making a mockup is a fast and cheap way to populate your layout with structures, before replacing them with something better when time permits |
The brickwork I found is not that close to the modified English bond
that is on the prototype. The brick
styrene used is flemish bond, a sheet from the Slaters range.
Whilst this is a British company, and one would expect the brickwork to
be OO scale and large for HO, in reality, the brick size was actually about right for the HO scale Bomen station. But, all jokes aside, it should work OK, as only the best nit picker will know......
 |
| SE corner of the station, showing the english bond brickwork |
Cutting out the windows and doors is a task that took me
over 2 weeks, whilst other priorities took hold. I have kept the cutouts for possible use for
the chimneys. I have only one sheet of
the slaters brickwork, and the Bomen station toilet and lamp room building is
another that has to be made, so being frugal with the material is important.
The wall edges were then sanded to a 45 degree angle, which
should minimise the gap when the wall sections are glued together. As with everything, resist the temptation to
rush to assemble, until all the preparation is done.
 |
| All 8 wall panels cut to size, and windows and door openings started. I goofed with one of the windows on one wall, and my fix is currently quite obvious. Unfortunately, I didn't have more styrene to cut a new wall, but once puttied, rescribed, and painted the join might not be as visible. |
All of the windows, and many of the doors will have an
arched corbel cap, and a distinctive brick pattern. This work is best done whilst the wall
sections are “flat”. Then will come the
fiddly task of fabricating the windows, and doors. This will be the subject of the next blog
post on the station construction.
 |
| Detail of the brickwork pattern above the doors, and windows |
Part of my delay in starting the build of Bomen, was that I
am continuing to tidy up the back half of the garage, in preparation for the construction
of the future train room. As a
bonus, I found my January –March 1989
copies of the ARHS Bulletin. Rod S, over
in Wagga mentioned to me about an article written by R Scrymgeour concerning
the Tumbarumba branch Line, and in the 29 years since publication, I had
forgotten its existence. The article
complemented the information and photographs I already had. I have now placed all the pages from the article into an A4
display book for easy reference. There
is a reason why old magazines get kept.
 |
| Rails North PC1 station, similar to the station at Rosewood and Glenroy. If I use this model, I will have to update it, with new paint, downpipes, and water tank |
 |
| The future Humula Road single lane overbridge. I built this model in the 1980s to the plans that I drew of the roadbridge on the Canberra branch line, just to the west of Queanbeyan station (bridge replaced in the 1990s). I built that bridge for a large 10 x 5 metre exhibition layout in the 1980s, that incorporated 2 railway scenes. The layout was an island, with viewing on all 4 sides. One side and end had Molongo Gorge, to Queanbeyan, the other side and end Yass Junction to Yass town. Unfortunately, the layout was vandalised in storage, and it only made a few appearances. There were some pictures of the layout in better days published in AMRM. |
I also rediscovered a few of my models constructed in
the 1980s for an earlier home layout. Two of these have a chance to be reused.
The station is a “Rails North” resin kit, being the standard NSW PC1
design – used on the Tumbarumba line beyond Humula. The light blue is roughly the same colour as
I remember of Rosewood station. Whilst I
do not have space for a full Rosewood station, I might be able to fit in a token
platform between Humula and Tumbarumba.
The other model is a model of the bridge over the railway line in the
ACT just west of Queanbeyan station. I
discovered a picture of a similar bridge carrying the Humula Road over the
Tumbarumba line near Rosewood.
Until next time. Stay warm, and build a model or two.