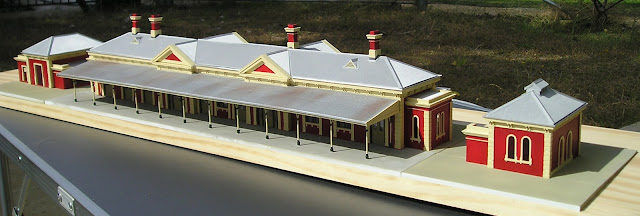
Concrete paving - an exercise in using a lot of styrene.
Turning a group of buildings into a ready to install diorama is the subject of this blogpost.
Creating an illusion of reality ensures that buildings form part of the landscape, and don't sit on top, with a visible "air gap" under the walls. Way back 20 years, I conducted an experiment on the ACTMRS layout, "!2th Street Yard", where I installed a sidewalk along a sloping street, with a 3mm deep gap between the sidewalk, and the backscene where building flats could be placed.
From normal viewing angles, you could not see the gap. The experiment worked.
I have attempted to follow this example with Wagga Wagga station, by cutting slots in the plastic styrene for the same purpose. from normal viewing angles, you won't see a gap.
Station Platform, and awkwardness.
The main platform was integral to the platform awning, and it scaled 5 mm higher than the base of the walls. At the same time, the footpath at the main entrance was only 2mm higher than the base of the walls. This set the scene where the concrete paving had to slope 3mm , or almost one scale foot from the platform to the front footpath. Fairly subtle, but necessary. This little fact has complicated the paving task - and added a lot more time to my build.
 |
 |
| The Gents Toilet building sits in a cutout. Note the way the edge slopes from 5mm to 2mm. (You may need to click on the image to enlarge this) |
After around 3 weeks of what I admit was a dull, and tedious process, I was able to spray paint the paving floquil concrete. Yes, there is a slight variance in the colour of the platform under the station awning - simulating I hope, a different surface texture. I have also sprayed the roofs of the Gents toilet and museum buildings.
None of the concrete paving is yet secured, as some fine tuning still is needed, and that may be easier on the workbench. But once glued into position, the slight warping of the paving on the roadside, will be eliminated.
Roadway/ Carpark
Finally, something extra. Using Floqul Grimy Black, which does not swell the wood fibres, I brush painted the roadway. Maybe a bit dark, but dust seems to weather it down.
Until next time, build a model or two.

.JPG)


