Borambola Goods Shed - modifying a kit
The Borambola goods shed is a NSW G2 design, built for the Wagga Wagga to Humula branch line opened in 1917. The railway authorities had obviously assumed that Borambola would have a significant future, as they also constructed a large A4 station building, station master residence, as well as an elevated water tank. History though tells that this optimism was unfounded. The A4 station building was relocated to Uranquinty, and no growth occured, until the line "closed" in 1974.
But, in a twist, the goods shed became a survivor, when all other buildings were removed. Whilst it is no longer possible to access, as far as I can tell, the goods shed is still standing today
.jpg) |
| The goods shed in 1990 - photographer unknown. This is the view from the railside - the track having been removed |
My only visit to Borambola was in the early 1980s At that time, I was not planning to model the line, so I only I took a few slide pictures of the general site.
 |
| My 1980s general site picture, looking north (towards Wagga). Hidden in the shadows of the goods shed, the water tank can observed, glinting in the sun |
 |
| Looking south in the 1980s The large platform of the goods shed is difficult to determine |
A few years ago, I received a few pictures showing the goods shed as it was in 1990. Up to then, I had assumed (and hadn't recalled the difference from my visit) that the shed was similar to Ladysmith, but the pictures showed a large timber platform, typical of the NSW G2 design.
..jpg) |
| The water tank had been removed, leaving the guttering |
(3-91).jpg) |
| A 1991 view of the shed taken from Mates Gully road. Note the lack of the water tank confirms the time line |
 |
| Graeme Skeet took this picture after the line closed, showing the goods shed, water tank, with the stark bare paddocks in the background. (note the waiting room station behind the goods shed is not attached) This will approximate the view from the aisles of my layout - An easy background to paint |
The kit.
I bought two NSW G2 laser cut kits in 2017 from the Stuart Walker range, and constructed the ladysmith goods shed, leaving one for Borambola. In the subsequent 6 years, I skills had improved to such a degree, that the idea of making a G2 shed from styrene was probably be just as fast as a kit, and wouldn't need to compromise. And selling the kit would provide some funds. But, I bought the kit to build, so I may as well build it.
(My earlier build of the Ladysmith goods shed can be found on this link.)
https://buildingwagga.blogspot.com/2017/09/ladysmith-goods-shed.html
The Walker range of kits is aimed at the beginner to intermediate modeller, and assemble extremely well. But, there are deficiencies that with some tweaking, can be overcome
 |
| The unopened kit. The colour image on the label shows the finished shed, and it is overly clumsy on the platform. |
 |
| The Borambola G2 shed did not have the annex, so I filled in the laser cut holes. |
 |
| The biggest visual error in the laser cut, is that the board thickness is significantly thicker than scale. So I rebated out a channel on the edge of the laser cut platforms, and attached "joists" from stripwood. |
 |
| Adding the main beams underneath, and painting the platform floquil "rail brown" give the illusion that all the platform boards are thin |
 |
| The kit has wooden corrugations sections that fit onto the heavier laser cut structure. When installed, these have a corner gap, that will need to be filled with stripwood (kit doesn't supply_ |
 |
| Small blocks are fitted on the platform to secure the shed. Note additional filled holes in the platform. If I had used the platforms holes (as the kit is designed to do), the shed would end up too close to the rail side, and too much room on the roadside. (check out the prototype pictures). This problem is because the Borambola shed was built mirror image to the standard G2 design that the kit makes |
 |
| The 5 main beams underneath the shed |
 |
| Ridge capping is done with Styrene strip, and rod - similar to the method used on the Wagga Wagga station. PVA glue holds this nicely. |
 |
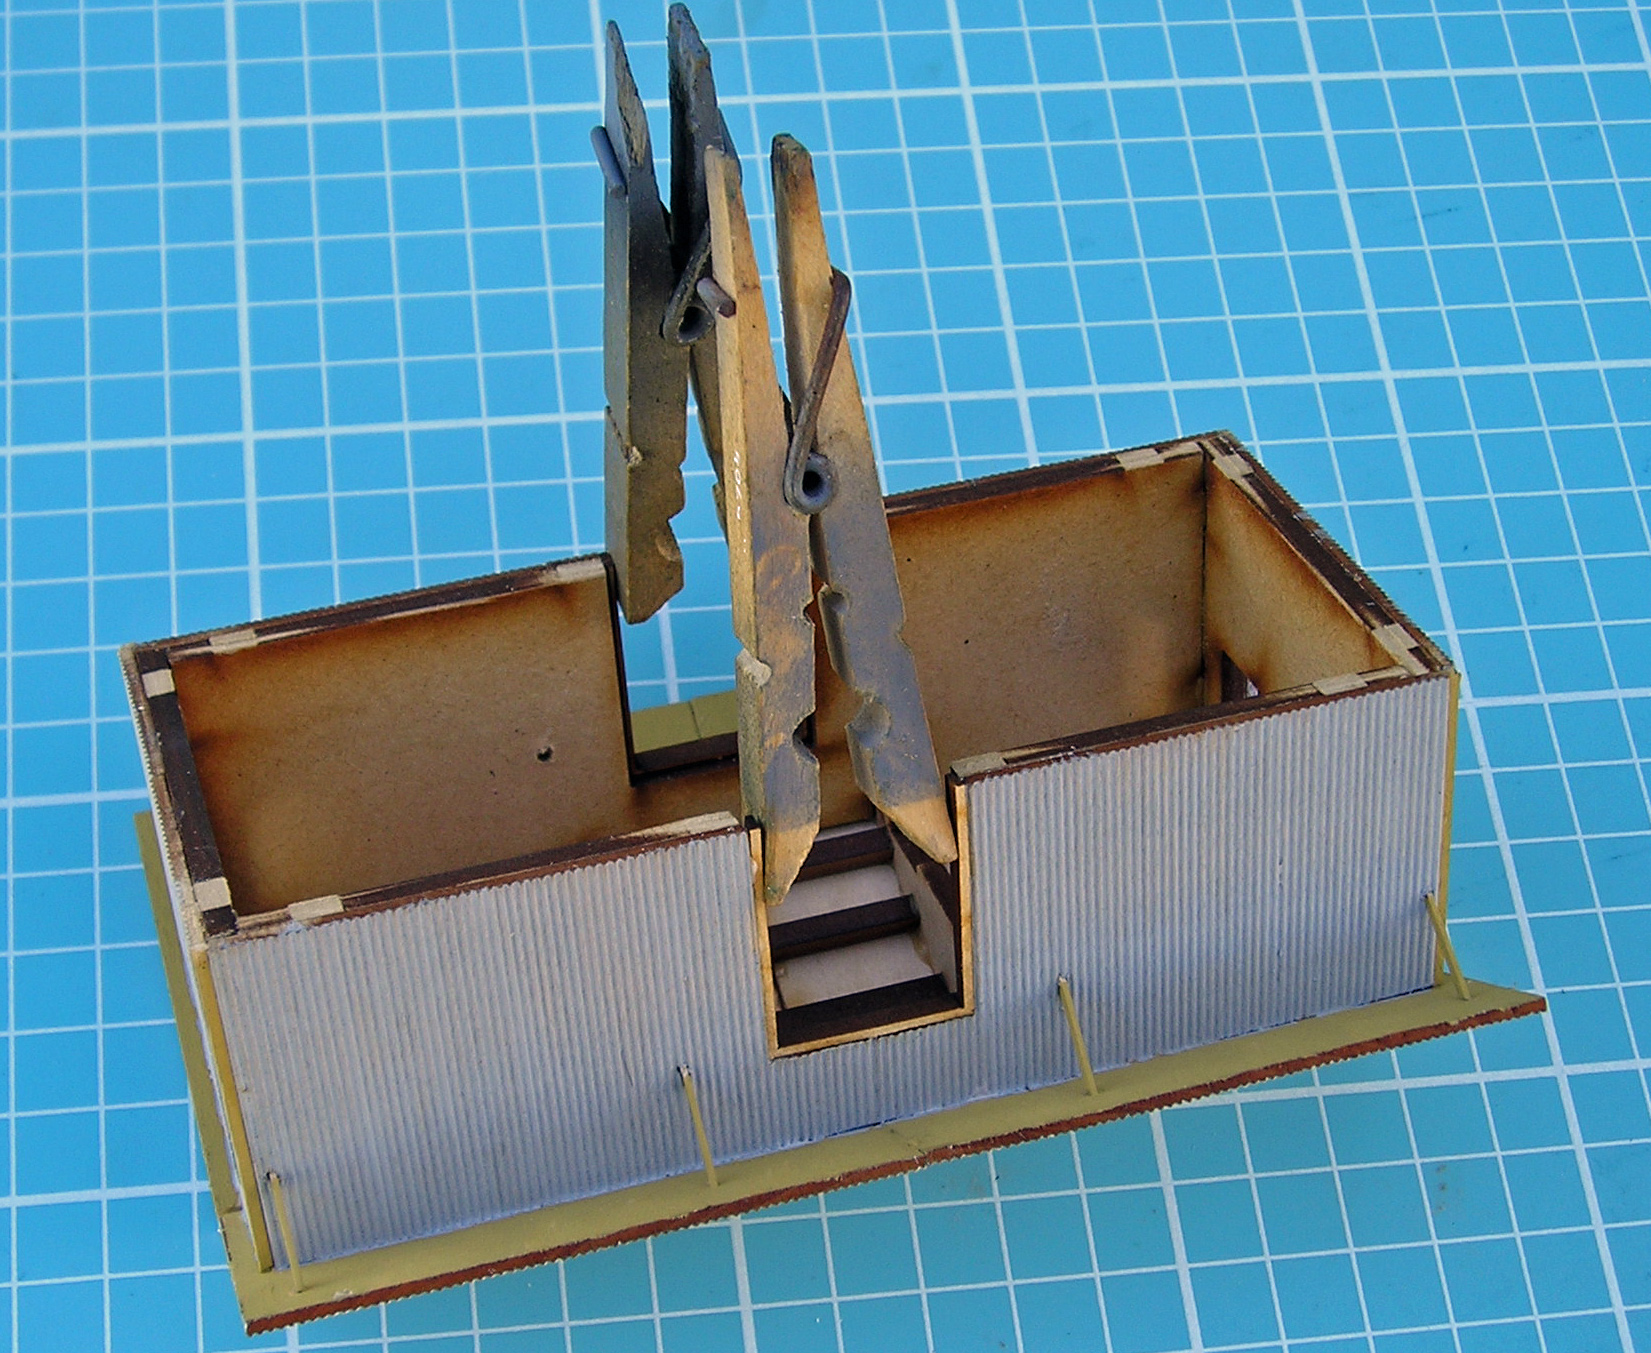
| Some reverse clamps (made from pegs) to hold the door jambs whist the glue goes off. Note the tab construction of the walls of the shed |
 |
| On previous shed, I struggled to get all the piers exactly the same height. Well, not this time. With 30 piers to make, I cut a number of strips from 4.5mm thick balsa boards with the table saw acquired a few years back. |
 |
| Being Balsa, the NWSL blade easily cleaved the strips into a square profile. |
 |
| My idea was to wrap the piers in brick paper. |
 |
| Gluing each pier to the beams was fairly easy, provided one gets the alignment right. Most of the piers will not be seen anyway |
 |
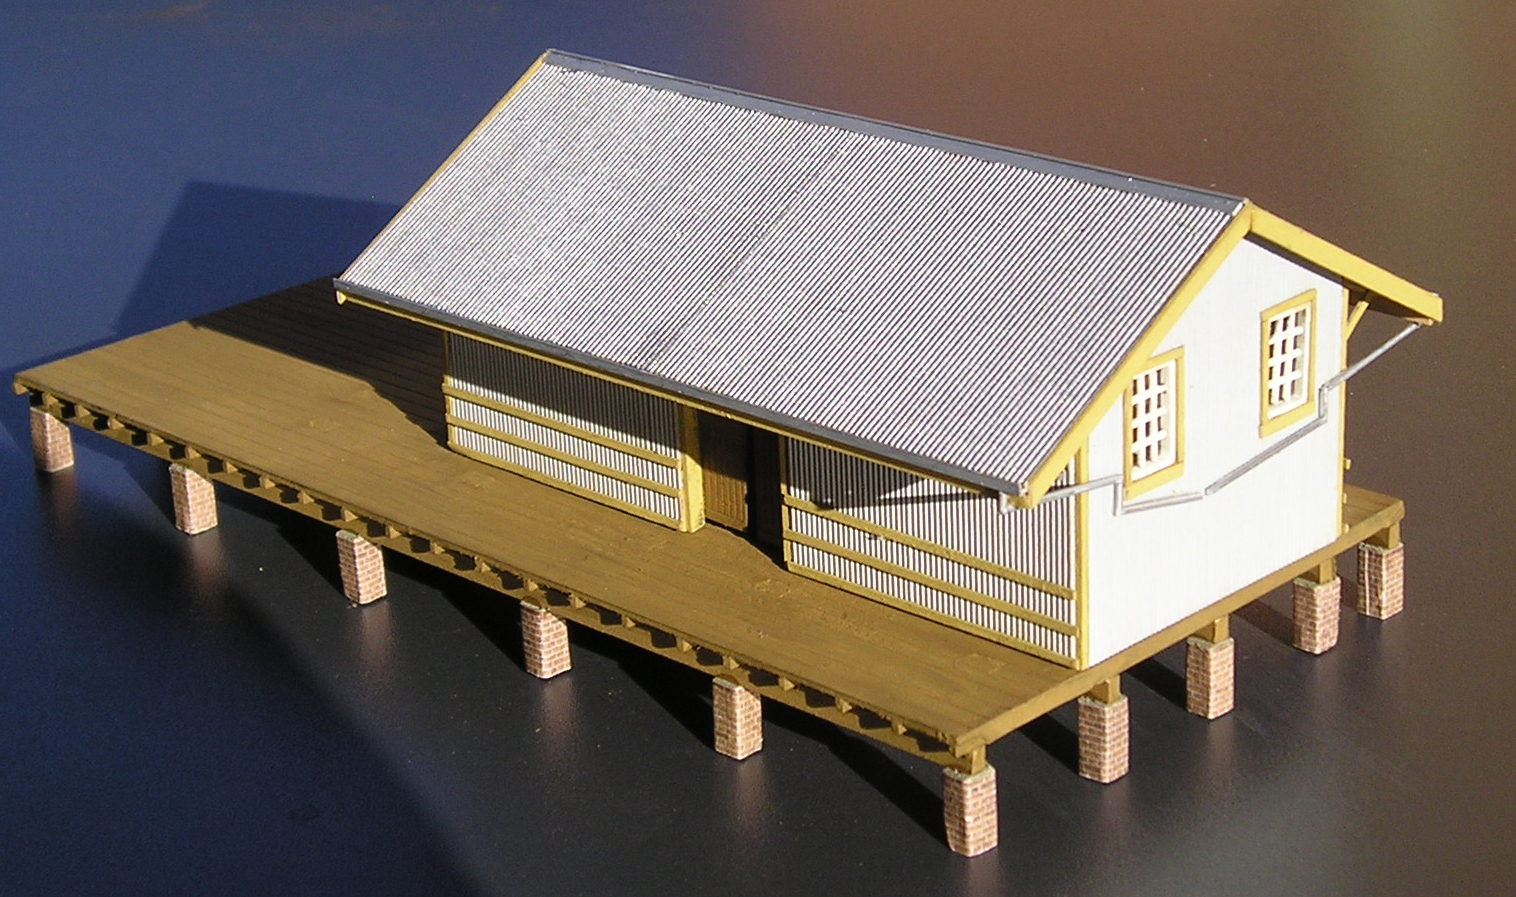
| Adding more stripwood to detail to the shed corners, brackets and roof gables. All the piers were the same height, and the platform was firm, no gaps, and didn't rock. Colours used on the shed are Floquil paints - primer, old silver, reefer white, depot buff, and rail brown. Not being water based, they brush easily, and don't lift the wood grain |
 |
| Guttering from 1.5 mm styrene angle, and downpipes from styrene rod finished the build for now |
 |
| Left the shed door slightly ajar. This side won't be seen from my aisle |
 |
| Roadside. The shed door is only lightly tacked in place, and could be removed if I ever decide that a wanted to clutter the interior |
 |
| The extensions for the water tank on the downpipes would add to the chance of breakage when handling, so not yet added. The styrene downpipes are secured to the shed with white-glue. |
The shed is now ready for detailing - as can be seen from the 1990 pictures.
Modellers Note. I made a decision that my Tumbarumba branchline is well maintained, and modelling structures in a state of dis-repair is adding a degree of complexity that I don't need. Maybe something for a modelling contest, but as I have a lot more structures to make, time to move onto the next one.
For all of you heading to Rosehill exhibition this weekend; half your luck, too far for me, and please support the retailers who support the hobby. I am hoping to get to Albury exhibition later this month
Until next time
.jpg)


.....jpg)
...jpg)
..jpg)
(3-91).jpg)