Wagga station - Awnings continued (Front Entrance)
I was overly optimistic after the first awning was installed, that the experimentation had finished, and it was smooth sailing ahead. Well, it didn't turn out that easy.
 |
| Wagga station - front roadside entrance, as it appeared in 2019, after the latest heritage makeover. |
Doors.
Prior to the awnings going in, it was time to make some doors to fit the doorways. There are a lot of doors, but the techique is the same
 |
| West roadside veranda - concrete floor made in a similar way to the eastern side. The doorway is on the gable wall |
 |
| Here is how the door appears today. The dark brown colour now, is not the tan/buff colour of the Red heritage paint scheme |
 |
| The door built on clear styrene. The yellow post-it-note has the tracing of the doorway opening. I covered this in an earlier blogpost. I used Tamiya Buff for the door colour - close |
 |
| Fitted, in position. |
Inclined ramp
Wheelchair access, means no steps.
 |
| I don't have a blow-by-blow on this one. Essentially, it is 2 sheets of 0.040 thou styrene, with wedges to maintain the curve. But there is a trick. The uppermost styrene sheet has been pre-bent, using a technique I think is called knurling - a series of parallel knife cuts on the underside forces the styrene to bend gracefully. It is a technique I have used to bend planks for ship modelling. |
The ramp positioned to extend from the bottom of the doorways, to the curb of the future road.
Ironwork and roof
 |
| Take the front entrance etches from the fret, and bend, whittle, and make it fit the 9.6cm wide opening |
 |
| Position the column bases, using the etch tabs, on the styrene base. |
 |
| Add the columns. These were made using the technique I described in a previous blogpost. Check the height - the side "stonework" blocks |
 |
| Start making the decoration for the awning roof. The white plank above the doorways is the roofline positioning mark. It is secured with small screws, for later removal prior to painting |
 |
| All those little corbels are fiddly at best |
 |
| After gluing in the corrugated roof, the awning can be removed for the next stage, which fortunately, occurs on the workbench |
 |
| Relocated back after fitting the missing sections of the awning roof. This is my third attempt at cutting out these triangle shapes. The first time, the peak of the roof was not horizontal, the second attempt, the peak of the roof was off at an angle to the walls. The third attempt was better, and good enough for me |
 |
| Post-it notes make good templates. To get the angle right for the reinforcing styrene, I ensured the post-it-note fitted without gaps. The template also good for the gable end |
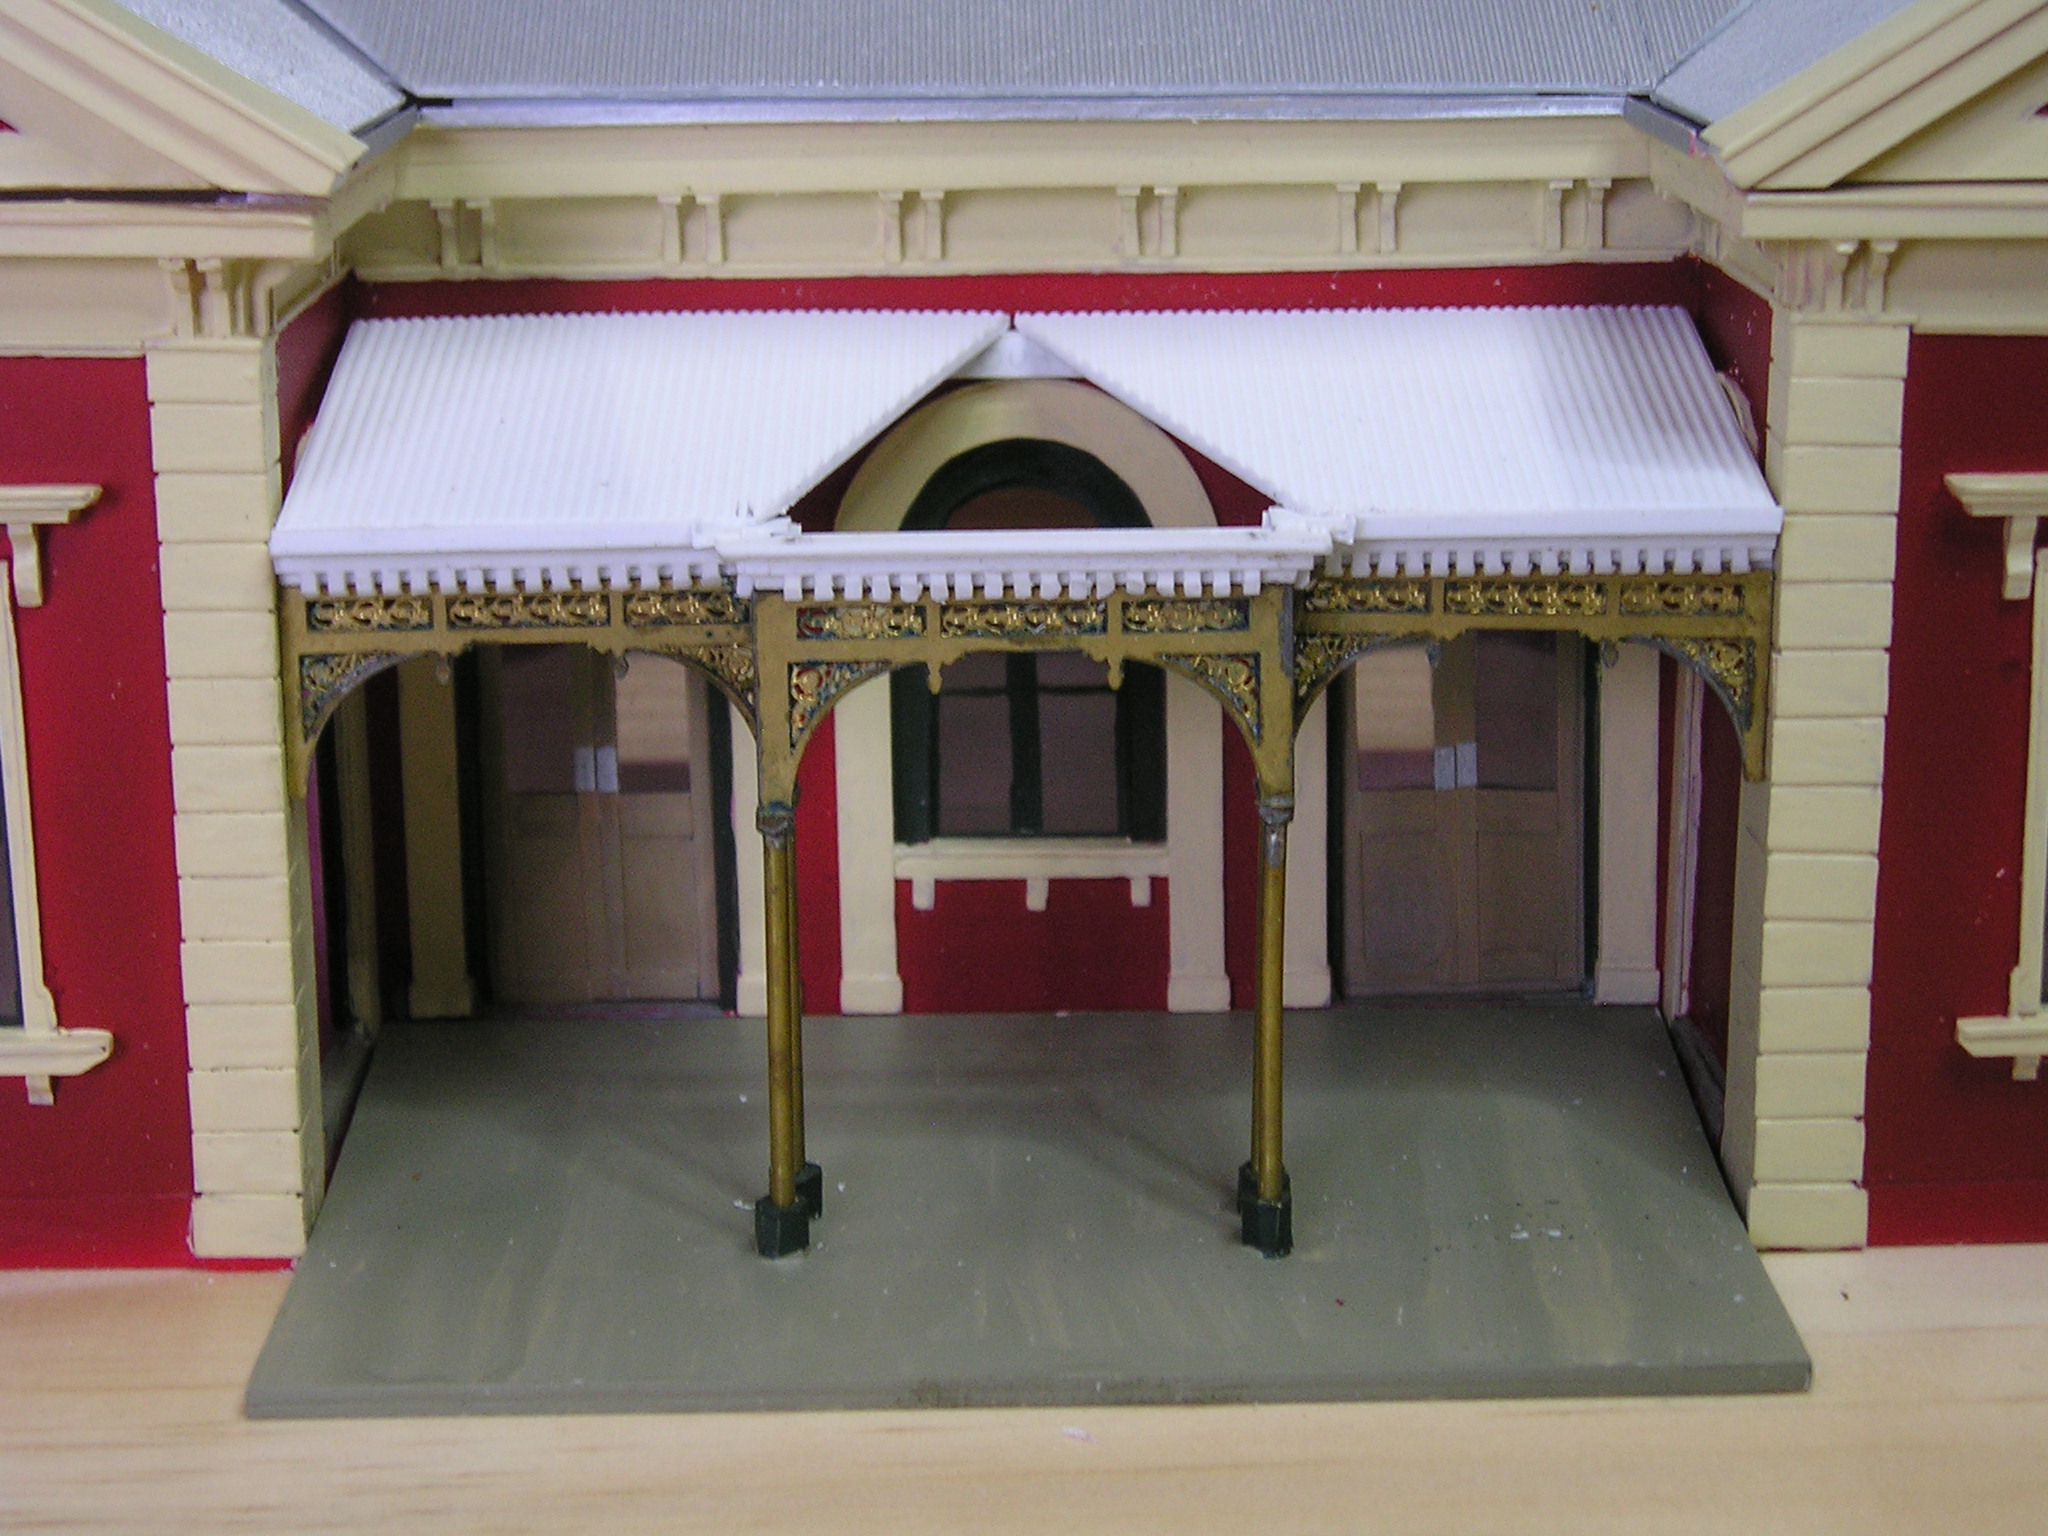
 |
| Making the gable end for the front entrance was tricky, with lots of custom cut pieces of styrene, for the trim. However, looking at this picture, and comparing it to the prototype at the front of this blogpost, I might have to make some adjustments to the triangle feature. Still, it is good to see how visible the entrance doors are. |
 |
Another minor issue, was that the roof capping "melted" in spots, as I might have flooded too much styrene cement. Unsure if I fill with putty, or simply lift the melted strips, and replace.
|
Progress is a bit slow, but one has to work at ones own pace, and priorities. Again, much thanks to Ross Balderson for the etch artwork, and Badger Bits for arranging the etching.
Until next time.
 |
| Trouble, the now 2 month old kitten, has taken an interest in my typing on the keyboard - and is another reason, why progress has been slower than I would hope. |


No comments:
Post a Comment