NSW
C30T on the Tumbarumba Branch.
One of the
disappointing aspects of trying to model the Tumbarumba branch around 1970, was
that very few locomotive classes were used.
After about 1961, virtually all the traffic was handled by 48 class
alcos, with CPH railmotors for the passenger trains. Steam working on the branch virtually
stopped, with only the occasional steam special hauled with C30T, and the rare standard
goods on special workings.
 |
| Lachlan Valley maroon livery 3026 with a shuttle train heading to Ladysmith, passes Rocky Hill in 1985. My photo converted from slide |
Prior to
1961, C30Ts handled most of the goods trains, with help from D50 standard
goods.. One had to go back to the 1920,
and 30s to find Z19s and Z25s
This blog
post though will concentrate on the C30T, mainly through photographs, and
include a modelling angle at the end.
Pictures
from the Tumbarumba and Wagga Wagga Rail Heritage booklets
Tumba
rail have been producing a series of A5 sized booklets, showcasing the line,
and publishing a number of photographs accumulated over the years. These are a great resource for my modelling,
and I have received permission to include some of the pictures with
acknowledgement in my blog. (Apologies
in advance for the poor quality of the scans).

3080 at Tarcutta in 1954 - I K Winney photo 
3060 passes Shell Siding in 1960 with a long goods - Barry Lynch photo 
3060 just east of Copland street crossing - April 1960 - Barry Lynch photo 
3001 at Tarcutta in August 1953 - Jim Powe photo

3060 on Wagga turntable - around 1960
Steam
excursion.
The ARHS,
and Rail Heritage groups run a number of runs to Tumbarumba in the 1960s
and early 1970s. Some of these pictures have been uploaded to
the internet to be shared. I also have
interviewed Pete Neve – who has supplied me with some of his pictures from the
1965 double header trip
%203142,%203020%20Humula.JPG) |
| 1965 tour - at Humula |
 |
| 1965 Tour 3142, and 3020 taking water - at Borambola - Graham Pegg picture |
 |
| 1965 Tour train arrives at Tumbarumba - Graham Pegg |
 |
| 3020 on the Tumbarumba Turntable - Graham Pegg photo |
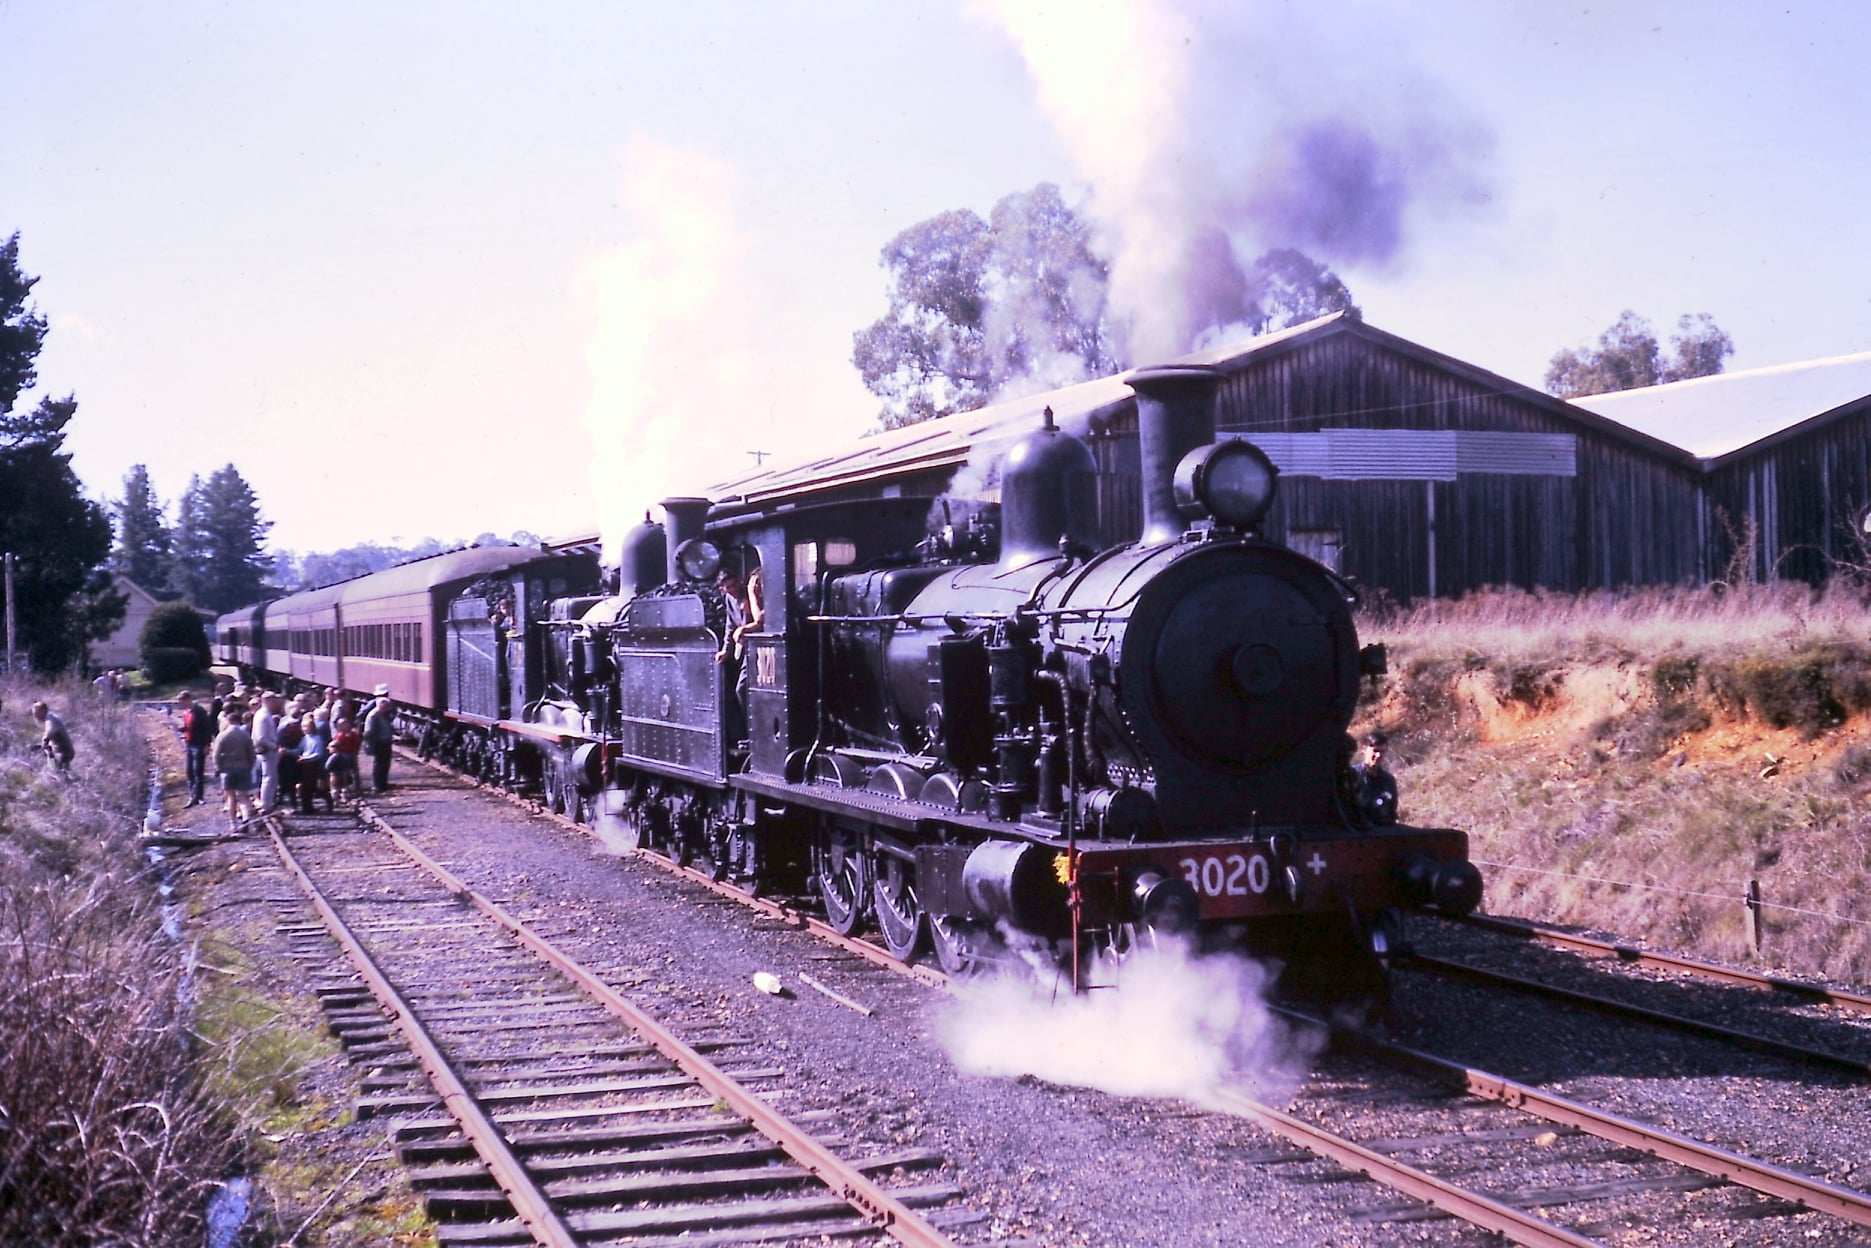 |
| Remarshalled for the return trip. Tumbarumba Potato Shed in the background. Graham Pegg photo 1965 |
 |
| 3020 and 3142 returning to Wagga - Graham Pegg photo 1965 |

1965 tour train crosses Mannus Creek - Pete Neve photo 
3020 (and 3142 hidden) crosses the bridge just north of Humula - Pete Neve photo 1965
Lachlan
Valley steam shuttles to Ladysmith
After the
line was cut near Tarcutta by flooding in October 1974, the only steam loco
that ventured onto the line was Lachlan Vallery’s C30T 3026. I was fortunate in being able to travel
along the line to Ladysmith, hauled by 3026.

Green 3026 taking water in 1983 - my photo

3026 approaches Lake Road level crossing - my photo 
One trip, Tender first to Ladysmith - My photo 1983 
After run-around, the train is ready to depart - My 1983 photo converted from slide
Modelling
a C30T.
In the
early 1980s, Bergs Brass Models had the C30T made in HO. It was a must have. I purchased mine from Peter Pan, in Canberra
for $285. I painted my model in colours
close to Lachlan Valley, and numbered it 3026.
It was, and still is a solid model, with some shortcomings in detail, an
extended firebox into the cab, and openframe motor. But, this was the only model for some time,
until Trax brought out their excellent C30T, with bogie tender around
1988. Quite a rare model if you can find
one
 |
| Bergs 3026 - repainted to LVR colours. |
 |
| Bergs 3008 - bought on ebay around 2017 cheaply as it didn't run. Problem was the cummutator pickups on the open-frame motor had worn out |
 |
| 3028 - bought privately a few years ago. Paint job is excellent |
 |
| Another Ebay purchase, only last year. The original Bergs 6 wheel tender had been replaced by someone with a brass bogie tender - possibly from a Bergs 32 class. A far more suitable arrangement, as all the photos, apart from 3026, that I can find, had bogie tenders |
 |
| Trax C30T. What a difference in the details! Samhonga quality model from the late 1980s. |
Later,
Footplate Models/DJH produced a C30T kit, with Portescap gearbox/ motor, and 6
wheel tender. I bought a kit at the
time, and it sits in storage, awaiting assembly
For those
wanting plastic RTR, Wombat Models produced a great looking and running model
in about 2017, initially with a 6 wheel tender, but the second batch also
included a bogie tender.
 |
| Wombat models C30T with 6 wheel tender crosses my model of the Kyeamba Creek bridge. |
An
opportuntity?
I was
checking out the Trains, Planes and Automobile site in 2019, and noticed they
had an assembled DJH C30T for auction.
Just one photo – looked OK.

Picture from the TPA catalogue. Not even with the tender the correct way around. Hopeless, Lighting is also poor. TPA charge sellers around 18% seller commission, and I would expect for that, they would a) test the model, and b) have better lighting for their catalogue images
As I live
no-where near TPA’s auction rooms in Katoomba, I could not check in person, so
I placed a modest online proxy bid, and waited.
To my surprise, I won the loco for around $300 including commission and
post. Just over a week later, the loco
arrived at my place, and I now understood why others did not bid. Not only was one tender axle missing (TPA
lost it), the others were loose. Many of
the tender castings were broken or missing.
The loco body sat high on chassis at the cab end.

Missing axle on the tender when it arrived al my place. The poor body to chassis fit is not obvious in this picture 
Underside of tender. The pickup for the wheel is visible, as is the poor standard of soldering 
More poor soldering on the drawbar attachment end 
The red wire is the link from the drawbar to the Portescap motor. It was routed in such a way that the body would squash this wire when attached to the chassis.
I had
intended to replace the 6 wheel tender with a DJH D50 tender – (I had
previously purchased a part assembled D50 cheap), so I wasn’t too phased with a
damaged tender.
.JPG)
The part built D50 kit. I had thought I would use the tender of this kit to replace the C30T tender.
As I was
fixing the chassis problem, caused by a poorly routed motor wire, I was
interrupted on the workbench. Loosing
focus, my shirt sleeve caught the body, propelling it off the workbench, Thus the body ended up damaged on the wooden
floor. Unimpressed, and after taking some damage pictures, the whole
lot was placed in a clear Klip-it container, almost forgotten until I completed
Wagga station
 |
| The damage caused by the fall to the floor |
Repair
Tender.
In the intervening 3 years, I had sourced a replacement axle. When I was shorting out one of the insulating
bushes on this axle, (drill a hole, and insert a wire that touches both the
axle, and the wheel casting), I then saw the phosphor bronze pickup wipers in
the tender. So, the original builder had
chosen an inferior method for pickup that only collected power on 2 of the 3
axles. A good look at the tender shows a
shoddy assembly job, but this also explained why the axles were loose. The solder joins holding the axles were cracked. Simple resoldering repaired. However, .in the process of reinserting the
axle, the axle box fell off. Cause easily
identified, no tinning on the brass, and the subsequent use of low-melt solder
did not provide a firm connection of the whitemetal axle box casting.
Body.
It was then I found some bubbling paint on the cab to footplate
join. This paint easily flaked off when prodded. Cause most probably inadequate cleaning of
the body prior to painting. The cab was
bent back into roughly square, and resoldered. The funnel, and headlight were glued
as I could no longer access the inside of the boiler for a lowmelt soldering
fix. However, for strength, I inserted
a brass pin into the base of the funnel, and drilled out a corresponding hole into
the boiler.
Chassis.
I reattached the motor wire in such a way that it was no longer affected
the reassembly. To my relief, the loco
mechanism was quite smooth.
Testing
on DC. After reassembly, the loco runs smoothly.
.JPG)
.JPG)
.JPG) |
| After repair. The missing tender balance bar is seen with a ghost image on the brass. Most of the axle boxes had also had the springs missing |
Future
work. My original idea to mate this loco with a DJH
D50 tender, but unlikely now, as I now have both Wombat, and Bergs C30T with
bogie tenders. And I am now aware that
D50s, with original tenders were also used on the branchline, with pictures
showing 5040 with a stock special in 1960, and 5163 shunting a returning Tumbarumba
train in Wagga
With all
the damage, and shoddy work, I just can’t justify spending significantly more
effort on this loco. I may just touch up
the paint by hand, and weather. Not sure
that fitting DCC will be on the agenda either.
Maybe sell it to raise funds?
Conclusion
Buying a
model on the basis of one photograph is risky.
And more so, when the seller does not provide any guarantees on its running
quality. Yes, I spent too much. Another lesson to be learnt. But, it was good to at least turn a bunch of
parts into a working loco, and it is one more task ticked off my huge
list. And I am back into building
locos. Now, maybe the D50 can be completed.
It has sat around for over 5 years
Until next
time.