Monday, 5 April 2021

Layout design and philosophy


For those who were expecting another post on Wagga Wagga  station painting?  Sorry. Painting is progressing, and whilst I am making good progress, I can only spend so much time on the workbench, before my concentration gives out, and mistakes happen.


So, in the meantime, I have reworked my layout sketches


3801 excursion train approaches Junee April 5, 2021 after spending Easter running shuttles out of Albury.  Photographed just before sunset.


Wagga – A layout designed for operation


It may be of interest when you are viewing my trackplan sketch, to know some of the philosophy behind the design.

One needs to have a proper idea of what you want in a layout, and design it for that purpose.   I have based the operation on real railway practices.  The layout does not have a long mainline, and running trains in scenery has taken a back seat to my interests of signalling, and shunting.  Mainline passenger operations are simple. Having a mix of industries in Wagga, and up to Tumbarumba should allow trains with a purpose.  The industries are REAL – nothing is made up, although the 1970 timeframe is stretched a bit to incorporate industries that were established later, for instance - 1971 (Tooths) and 1974 (Barnes cannery)   This is where research is really coming into its own

My proposed layout is prototypically based on Wagga, so in some ways, I already have limits on what I can do, and can reference the Southern Region working timetable.  But, it also has a need for 7 operators, and it will be operated very much along the lines of a USA layout operation if people are familiar with those..  Staging yards will have already formed trains.  Some trains will simply run from one staging yard to the other.  Some goods trains will need to drop, and collect wagons in Wagga’s goods siding loops, to be shuffled to the 13 industry sidings, in the Wagga yard area with an X200 shunter.  Bomen station will allow mainline goods trains some shunting.  Local passenger train to Tumbarumba is normally a CPH.  Goods trains to Tumbarumba are trains that will be made up in the Wagga yard track, but the branchline can generate goods traffic that has destinations for on-line sidings on the layout.  The Wagga signal box will be manned, and control the train movements on the visible portion of the layout.  A “train control” position  (dispatcher) is responsible for ensuring trains enter, and leave  the layout from/to staging, by assigning drivers.  This will keep trains moving.  A CCTV system is available to the train drivers so they can watch their trains entering, or leaving the staging yards.  Once a train has entered the staging yard, I do not expect it to re-appear in the operating session – although the train controller has full access to the staging yards, and  can shuffle a train from one staging yard back to the other using the “X” factor layout design I am employing

The branchline is quite long, and engine drivers will be able to shunt trains and wagons as needed.  Point control on the branch is with wire in tube from the fascia – so eliminating complex electronics on the branch.  The main Wagga station area points and signals are  electrically controlled from the level frame, with simple wires going to tortoise motors (or servos still thinking about it).  The only DCC selectable complex electronics is for the route selection of the staging yards, and that is assigned during an operating session by the dispatcher, not the driver.  The dispatcher will also have a manual green/red signal for the train drivers prior to them entering the hidden staging.

Room size – 9 metres x 6 metres – although there is an kitchenette and ensuite also within this area

Walk around control for all trains. Wireless an option, but lots of wired facia panels

Big width aisles, with short pinch points only. – but we will see

Double deck, with stations on the upper level staggered to not be directly over the lower level stations.

Shelf width only, apart from the Wagga yard – limits the scenery task to basically between the fence line

Radius of 24” (60cm) on the branch, and sidings  28” (70cm) on the main. 

Probably will use NCE DCC.  Only a few locos will be sound equipped – most will be non-sound DCC or sound turned off, as I find sound to be annoying in a room if more than 2 trains  have noise makers.

Reseting the staging yards is via the “x: factor design” and will probably take just an hour. But that will also test almost all the locos needed for the operation session

The big concern with my design is access to  the hidden staging if there is a fault/derailment -particularly as I will not have more than around 15cm of clearance below the Bomen yard.  Am considering a fold up hinge for the entire Bomen station area, although that complicates the trackwork joins, and electrics


Notes.

Tumbarumba

1) Barracks building.

Barracks, as restored on the railtrail

2) 60’ Turntable. Scratchbuilt Manual table, awaiting detailing and painting

3) Goods shed and 5 ton crane.  Models have been made


4) Station building. 


5) sawmill. 

Image supplied by Mark Pottie
6) Potato Shed.

Potato shed in the background. Photo by Graham Pegg


7) stock yards

Humula.  NB Trackplan not yet finalised – I may flip the station, and loading bank

8) stock yards

Remains of stockyard - 2020

9) Perway shed.

Last train - 1974

10) Toilet block and lamp room

11) Loading bank – used for local timber mill etc

ARHS tour 1965 shows station. G.Lillico picture

12) station building


13) Signal box

1980 - 5 years after abandonment


14) Scooter's bridge – relocated from near Ladysmith – similar bridges near Humula


Borambola

15) Goods shed

16) station building shed and water tank


17) stock yards


Ladysmith

18) Station building


19) Signal box – (similar to the one at Tarcutta)


20) Toilet block and lamp room


21) Goods shed


21a) SM cottage 


21B) Perway shed


22) Silo – part constructed


23) Kyeamba Creek bridges – built


Wagga Wagga

24) Boral


25) Esso depot


26) Tooths depot


27) Shell depot


28) Caltex depot


29) 60’ turntable – I have an Antons60 foot table


30) Barracks


31) Goods shed and crane


32) loading bank

33) Murrumbidgee Milling company

I have more recent pictures, but may have to base my model on this early one, as the present size of the mill building is huge


34) Wagga Wagga station – under construction


35) SM residence


36) Signal box – made


37) Cottage and old gate keeper cottage


38) Best Street bridge


39) and 39a)  Footbridge


40) BP depot

41) Hardys Timber siding
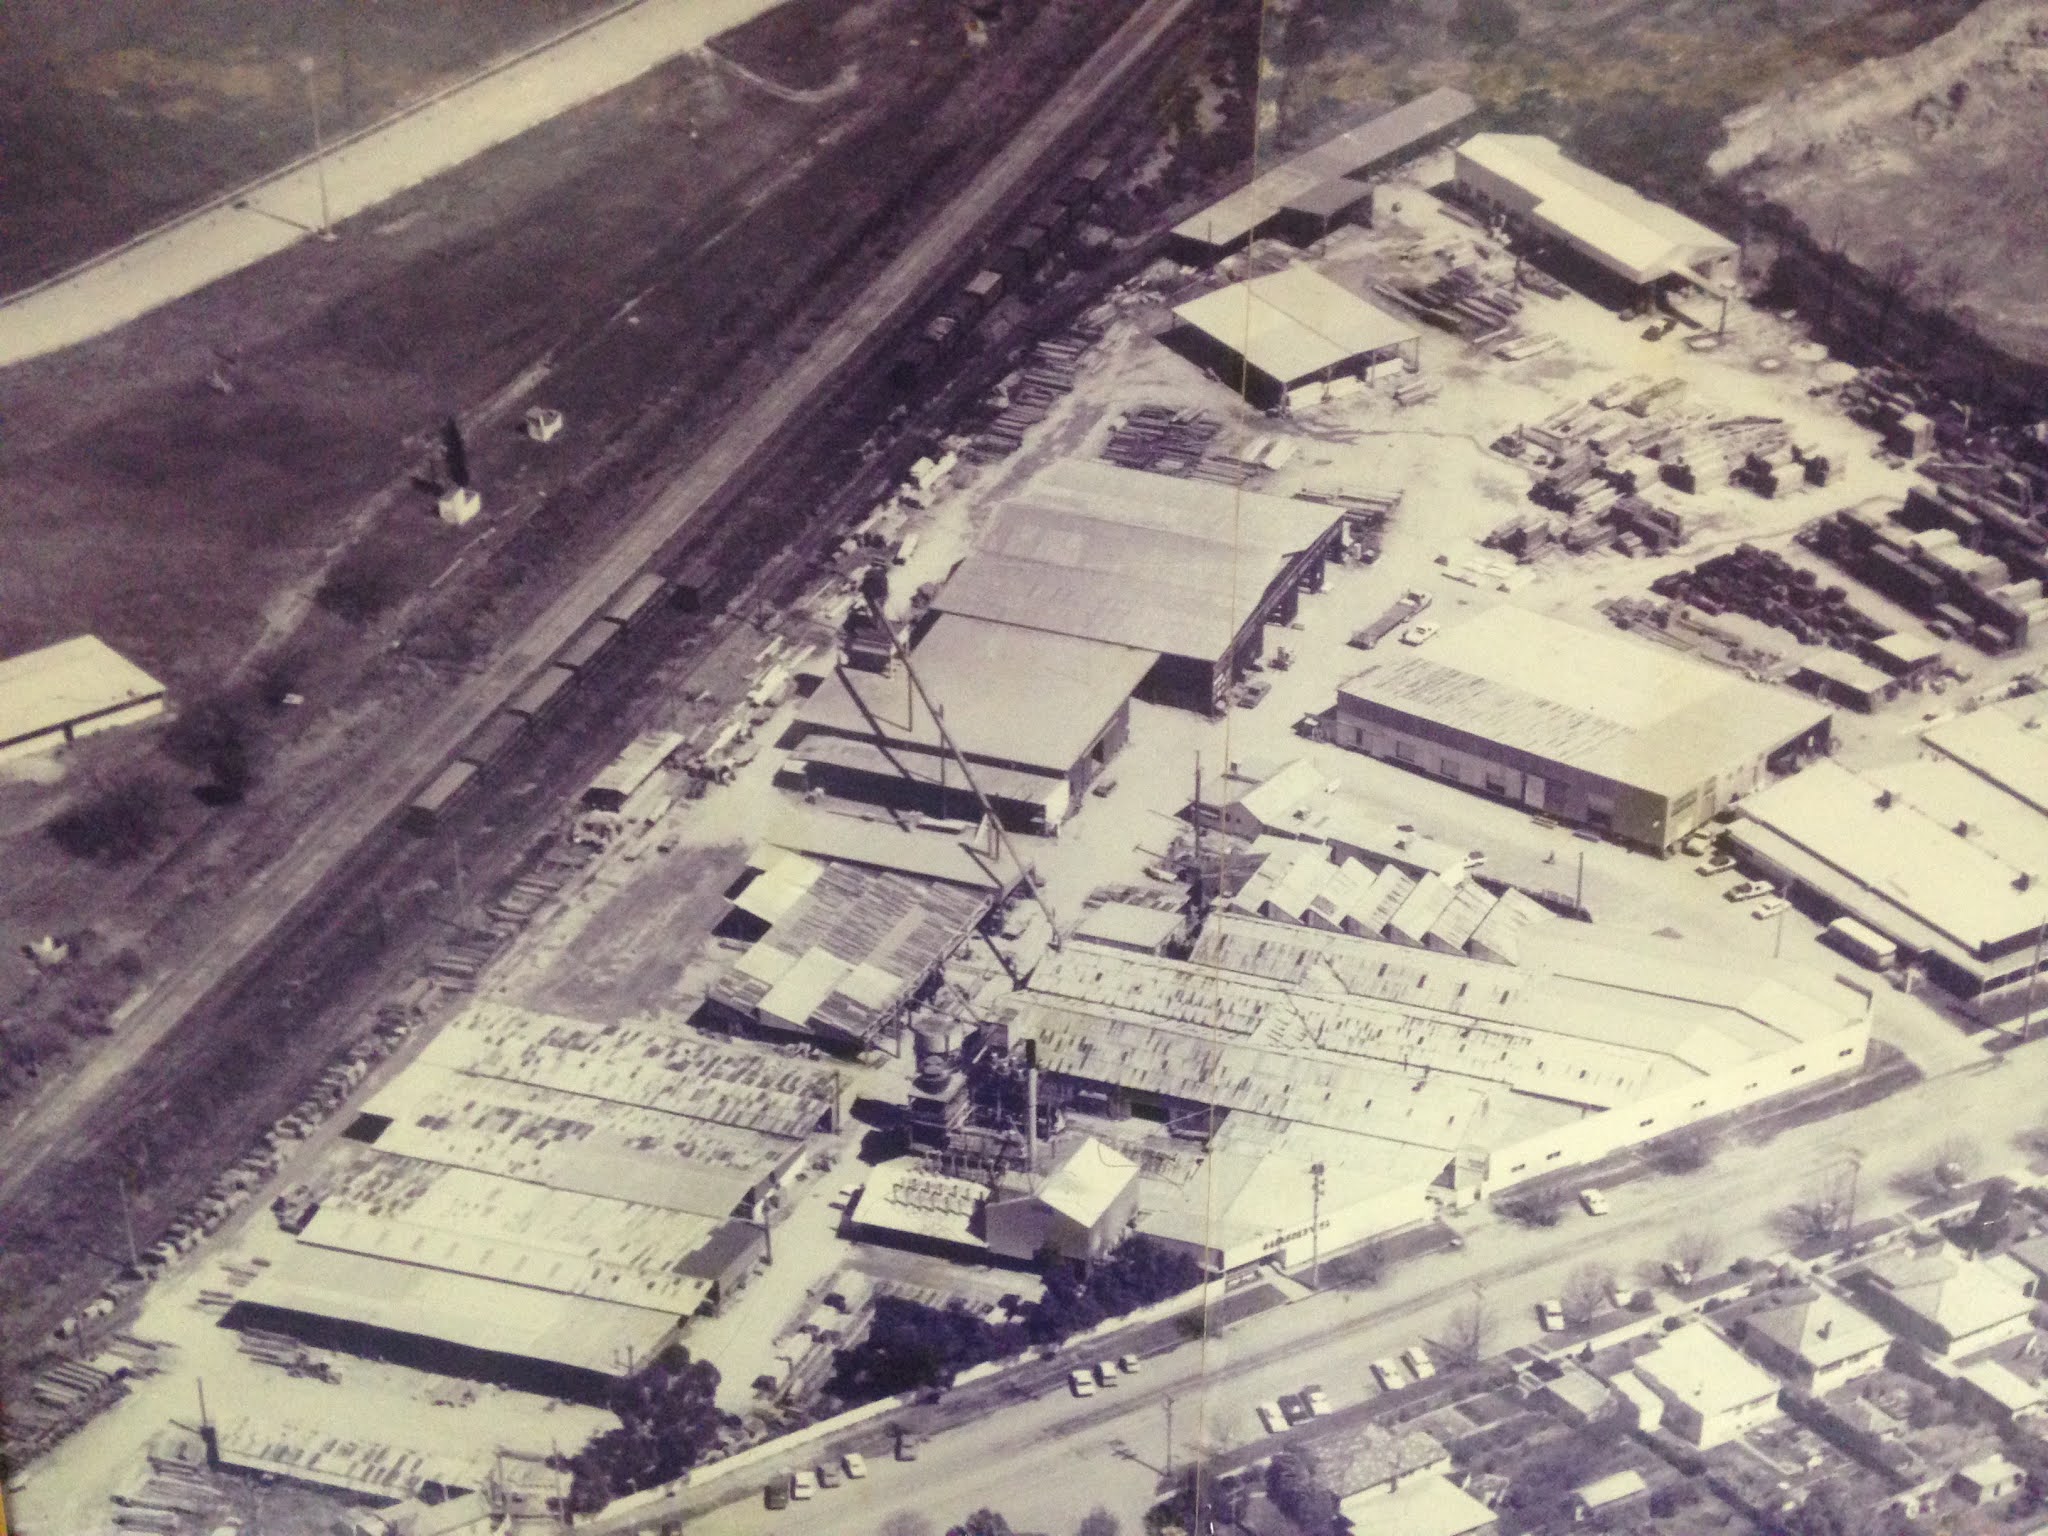


42) Wagga gasworks


43) Speed-e-gas depot


44) Trucking yards stock loading bank


45) Urana Street crossing, and Kapooka road bridge (to act as a tunnel portal)


52) Murrumbidgee River Bridge – 2 spans constructed – viaduct flexible to fit available space


53) Gatekeeper cottage

Tony Macillwan picture.


54) Edward Street level crossing

55) Docker street level crossing


56) 56 lever frame – 1/10 scale – Part built

Bomen

46) Wagga Abattoir, and stockyards

Site of former siding

Shunting the abbatoir siding


47) Barnes Cannery

Tracks in concrete still visible behind the gate


48) Station building and signal box – scratchbuilt.


49) Level crossing and SM residence – residence built


50) Hollanders leather works

1990 aerial image of the Leather works

Siding, and dock. The new shed is on the site of the leatherworks


51) Shepherds Siding silos


Staging

54) Scissors crossover – X factor design element – Shinohara acquired

55) 3 metre staging sidings for long trains (eg Southern Aurora)


Final thoughts.

Sorry for the extended post.  But taking inspiration from the prototype adds greatly to the authenticity.  Most of the pictures are those I have taken myself - but without the efforts of others, I would have many gaps.  Thankyou.  

Construction of models for this layout will take a long time.  But having a few already built will speed the layout construction.  And most of the track in my plans is subject to refinement closer to the actual platelaying, so please don't be too critical.

Until next time


Thursday, 11 March 2021

A Splash of colour

 Wagga Wagga station building - painting begins

Almost everything that I attempt in this hobby takes longer than I initially imagined.  Such is the case with the Wagga station.  At the end of the last blog, I thought I would be well advanced on the painting within 2 weeks, but my actual progress has fallen well behind that ideal.  


Wagga Wagga station in 1990.  I had forgotten that the hertitage red and cream had been applied to the station prior to the reconfiguration, and removal of the ugly rear offices.  One of the delays in the model painting was caused by me searching, and scanning some of my slides.

The first activity was fabrication of the two toilet wing extensions.  These would be my template for testing out my paint colours, and technique.  Both extensions are very similar.

Repeat for the other end.  The 3 sides of each toilet extension are identical.


3 sides assembled into a box, with a corrugated styrene roof

The gutter on the toilet blocks is hidden behind the walls. Note the extra thickness of the walls as viewed from above.

Staff end toilet block in position, after detailing finished.  117 pieces of styrene used for each.

Ladies Waiting room toilets.  I noted that the railways' plans I had been using only had a single larger window for the  end, where the station was actually built with a pair of narrower windows.

Adding paint

My paint of choice for spray painting plastics is acrylic - namely Tamiya.  However, I don't trust myself with mixing colours consistently.  I have had some success in the past with Taubman's sample pots, and a trip to Bunnings co-incided with other activities in Wagga.  I selected "Streetwise" to be a close match for the dark red, and "Bamboo Cane" was close to the cream.  Cost was around $4.50 per 250ml pot - a bargain, although you would be unlikely to get close to using it all.

Sample pot paints tend to be a lot thicker than hobby paints, but can be thinned successfully with Tamiya thinners for spraying, or brush painting.  

Step 1, was to clean the plastic with detergent, and then metho with a cotton bud.  Allow to dry


Ladies Toilet block extension

Step 2.  Spray the red, and leave it for a day to dry. 

Step 3. Break out the brushes.  First paint the roof  ( Tamiya Aluminium ), and  very carefully brush the cream colour around the windows.  

Step 4. Paint the roof trim.

Step 5. Finally paint the blockwork on the corners.

Handling the model is normally with the corners - so keeping paint clear of that area should hopefully prevent cream coloured fingers from spoiling the red.


What I have found?  The red colour bleeds into the cream.  This could be not allowing the red to fully cure (impatience on my part).  The cream also needs more than one coat.   The streetwise red didn't dry quite as dark as the Taubman's colour chart had shown - but it isn't too far off.  Maybe a second coat would help?  Painting the trim is at best fiddly, and very time consuming. Plus it is for me impossible to paint the edges of the 0.020 thickness of the trim to get a sharp line with the wall.  Had the windows been assembled independent of the station walls, then they could have been painted prior to insertion.  With 3D printing, this should be possible (note for self).  Masking is an option, but the curves of the arches would make this extremely time consuming.

Colour changes in shadows and different lighting. Both toilet blocks are placed into the correct location, but not glued. 

At least the station roof is removeable for painting.


An ebay win


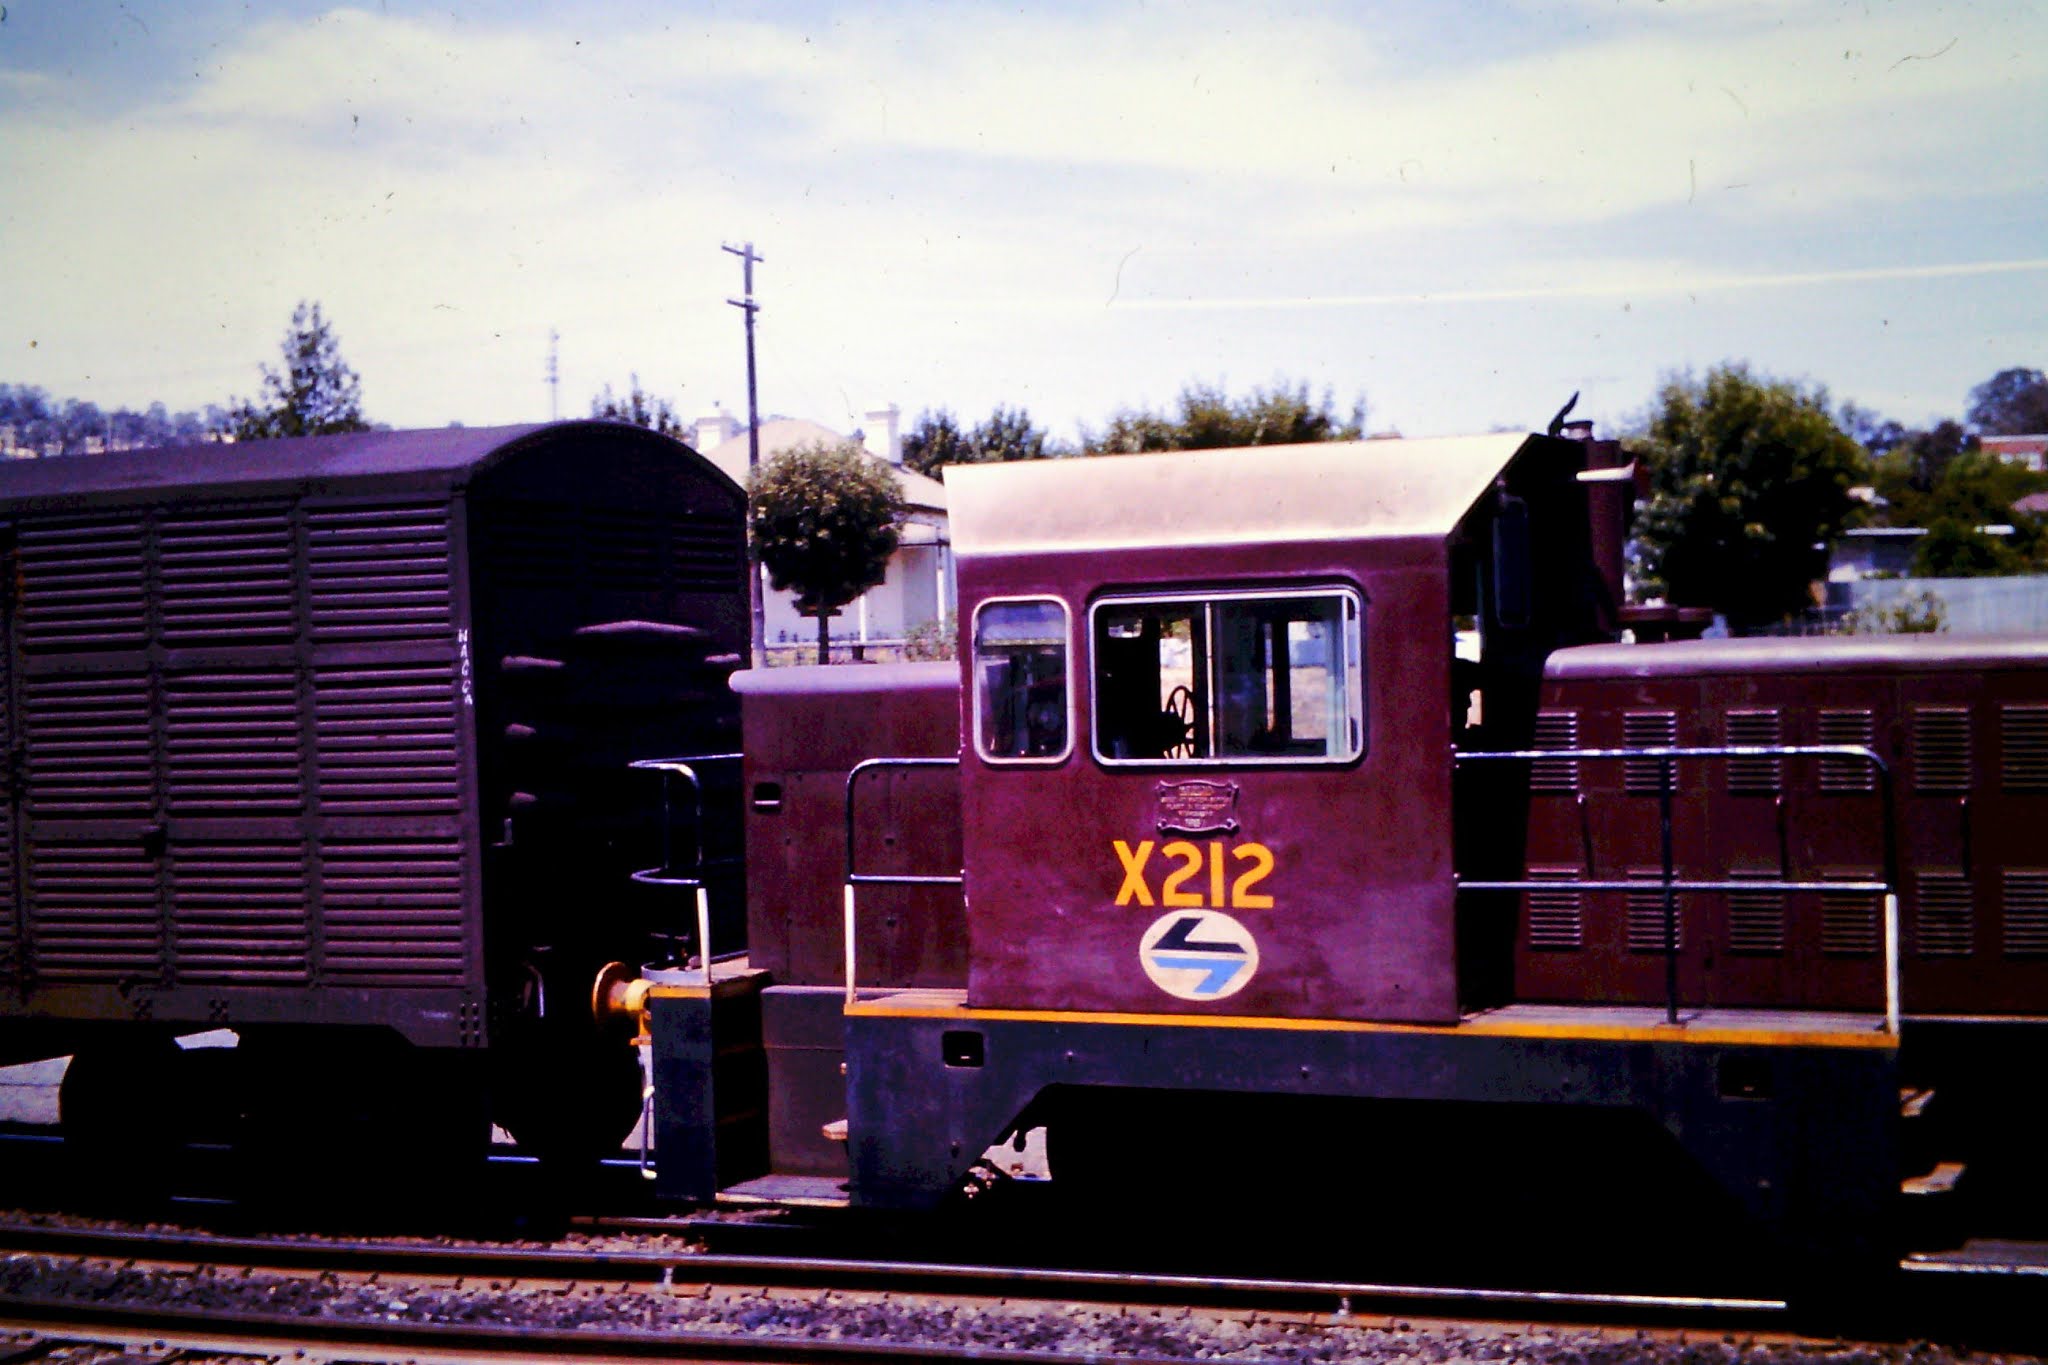
The X212 shunting tractor was the captive shunting engine at Wagga during the 1980s when I had access to a camera and a car.  So it was, and remains a firm favourite.

A long while ago in the 1990s, Bergs Hobbies announced a whitemetal and brass X200 kit, and I bought one, and of course, it had to be X212.  I was quite proud of my little loco - fitted the siderods, glazed, fabricated the decals.  It used the Tenshodo spud drive - so was probably a bit quick - but the extra weight made it very powerful.

Bergs X212 - a little dusty.


A few years back, IDR announce the X200 tractor as their first RTR model.  Of course, I needed one - but knowing I had X212, I bought X207 - another Wagga engine.

Last month, A seller on ebay listed a used IDR X212, fitted with DCC and keep-alive.  Price was a lot less than my original X207 purchase, and even less than the current reduced IDR RRP  I couldn't help myself.  After a short bidding war, I secured the model.

IDR X212.  Handrails are a bit flimsy for handling, and they probably need to be part painted black, but the loco is nice

The model performed well on my test track.  As people might know, I presently don't have a layout, but I am going to Yass this weekend for an operating session on Kangaroo Valley layout, where I have been given permission to run my X212.  

Southern Aurora visit

A sign of reducing Covid restrictons - a tour train visited Junee yesterday (March 11, 2021)  4204, and 42103 hauling 15 coach Southern Aurora set.  Rain held off for me to capture these images.  The southern aurora is a train that will be making an appearance on my Wagga layout - Auscsion 10 car set.


Way back in 1982, I photographed 4204 in Canberra - its last revenue run for the NSW railways. It is great to see the loco looking brand new after extensive restoration and overhaul


After arriving at Junee, the pair of locos ran around the train.  The tour was heading out onto the branchline towards Griffith.

Classic Bulldog nose diesels.  Not a lot of people like the former "candy"livery of 42103.  It is great to be still able to experience some classic trains from the past

A final shot from the camera of Pete Neve shows the train on the branch - nearing the former station of Rock View.


Approaching Rock View - picture by Pete Neve March 11, 2021


Until next time.


Sunday, 21 February 2021

Wagga Wagga station - roof now on

 Wagga Wagga station - roof, and details finished (although it still needs painting)

It has been just over 3 weeks since my last blog post, but rather then filling up the blog with another "unfinished" post, I am now pleased to advise that the main roof  has been completed


A 7 car (plus 2 engines) Federation orange XPT arrives at Wagga Wagga in 2002. Over the last few days, I have found (whilst looking for something else) some of my photograph prints, and scanned a few that have railway interest. Of note is that the south dock has been filled in


Chimneys

Similar construction method to those I made for the Bomen station masters cottage so I won't repeat it here (search for station masters cottage in the search area of this blog)

First I made a scale sketch of the chimney.  4 are needed. 2 are identical to the sketch, the other 2 vary slightly

Building up the profile of the chimney takes many pieces of shaped styrene, as this in progress picture shows.  In the end, each chimney had 32 pieces of plastic

Roof vents

Wagga Wagga station has 5 triangle roof vents.  I used the template created earlier to cut out the corrugated styrene, then bevel the edges, and cement the parts together.  Before adding the grills (0.010 x 0.020) strips, I blackened the interior with a permanent black marker to add the illusion of a depth.

Rather a fiddly job.  Cutting out the grills was measure, cut, fit; measure, cut, fit until the hole had been filled.  BTW, there should be 6 grill slats but I think the proportion looks right with 5.


Unfinished chimneys and roof vent positioned to check how it looks. Having the chimneys removeable is a neat thing to do
Roof ridge capping

I have always struggled with this aspect - never convinced that a strip of paper, or aluminium foil folded over the peak looks as good as the real thing.  So, the new technique for me (I am sure others have done this) was to add two thin styrene strips on either side of the roof ridge line, and cap it off with a styrene rod.  

Ridge capping on the eastern end roof, with yet another picture of an unfinished chimney

After the capping was completed, I continued with the flashing details around the chimneys, and roof vents.  Last things were to complete the guttering, as described on an earlier blog post.  

To my surprise, the 2 end sections of roof sit snuggly within the walls, and it is no longer necessary to screw them in place.  I am always looking for a time saver, so unless the roof sections start to warp, I will leave the screwing  option open for now.

End of stage 2 of the build

To mark this milestone, I thought I would photograph the station front and back with a green backdrop.  Green is not the colour expected of grass in February in Junee, but it makes such a nice change from the dust and smoke we had this time last year.


What is still needed to be done?

1) The two toilet extensions at the east (originally for station staff), and west (originally ladies waiting room) ends of the station
2) Painting
3) Window, and door inserts
4) Verandas and awnings, downpipes, and other details
5) platform to put it on
6) construct the two satellite buildings - lamp room (west), and gents toilet block (east)
7) maybe fit an interior into the centre waiting room


A hint on what is to come. Still some tweaking of the artwork size, before committing the design to  etched brass. No, I do not have this degree of expertise, and has been subcontracted.  More details in a future blog post.

Second last intercapital daylight prepares to depart Wagga station behind a pair of Goodwin Alco 44 class locos.  It was nice for the railways to run original motive power for the train, although the candy and red-terror colours of the locos, and train would indicate the  end of an era.  This was another of my photographic prints discovered in the last week. 


Until next time, stay safe, and build a model or two