Backscenes
It may be a while off yet,
but backdrops are a necessary part of the planning process, and the time
to think about this is before track goes down.
 |
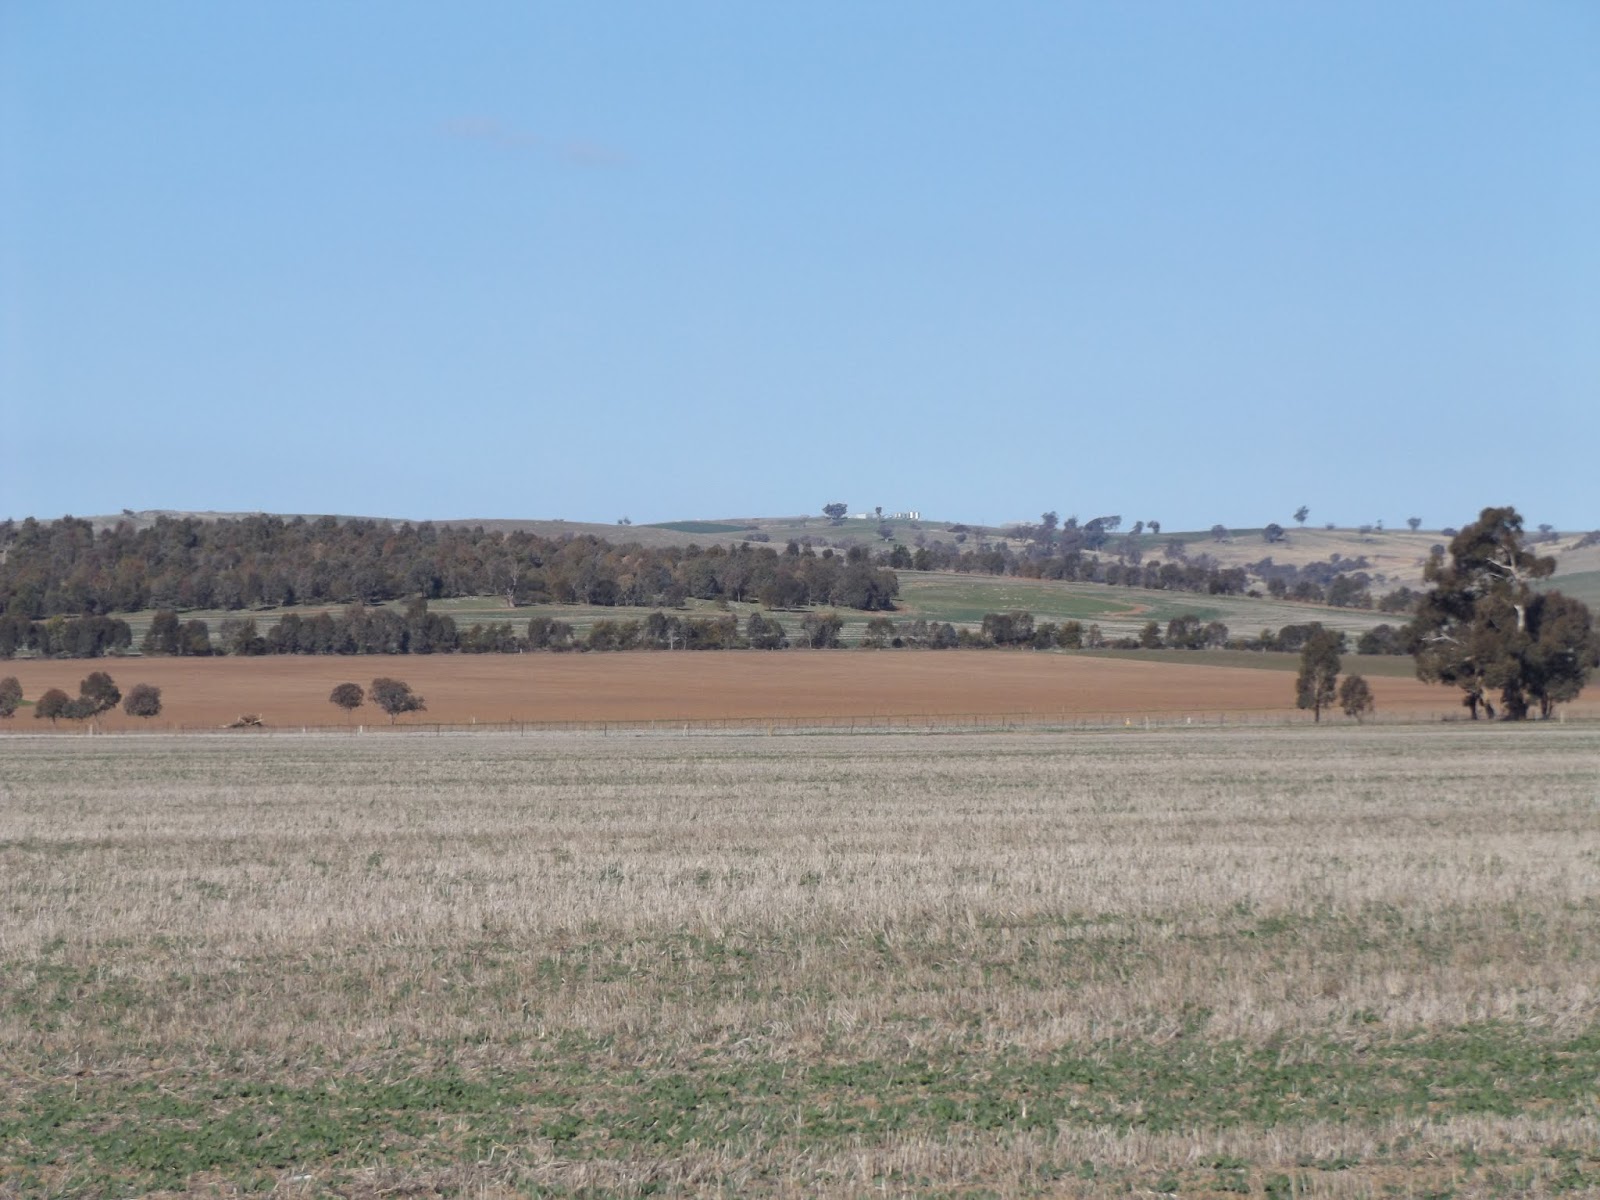
| Shepherds Siding Silo. The backscene image needs to be positioned so it looks right from normal viewing heights, as this prototype image shows. A grouping of small bushes helps disguise the join between baseboard and backscene. |
Way back (over 20 years ago), I was responsible for
initiating construction of a club exhibition layout, which became known as 12th Street Yard. The premise of this layout was 2 fold –
mainline running, with switching in an urban environment. To say this layout was a resounding success
was testament to the enthusiasm from the ACT Model Railway Society members, who
built, displayed and ran it on the exhibition scene for over a decade. For me, the layout was a major step up in
quality, and a steep learning curve that has influenced my later modelling
We made mistakes too – one of them was the initial lack of a
backscene. But I think the below
pictures (taken by Ralph Cooke for Continental Modeller July 2005) will give a hint how important a backscene is to giving a layout real
atmosphere.
 |
| Without backscene, the buildings at the back indicate the limit of the world, 600mm from the front of the layout. |
 |
| The backscene now has images of Chicago (although it could be anywhere USA), and far enough in the distance, to add some credence to positioning the layout 12 blocks away from the downtown area. The view also hints that the layout is elevated on a hill |
 |
| Disguising a street was probably the hardest problem we faced |
 |
| The inclusion of a suitable scene made a huge difference. This street image from the Morning sun book "Street car scenes of the 1950s" was image reversed to compliment the foreground. You would need to look closely to see the reversed number on the streetcar, billboard and the wrong direction of the cars. The drop away of "Liberty Avenue" disappearing to the horizon was consistent with the other backscene images we used |
Whilst many of the backscene photos for 12SY were scanned out of
books, I am lucky that I can take my own pictures for Wagga. As a shelf layout, the backscene is the major
trick to widen the visual appeal of the modelled area.
The first area selected is the farming area between Bomen
and Shepherds Siding. I expect that I
will have about 3 to 4 metres of backscene.
So armed with a camera, choosing a particularly nice day, I went out to
take a series of overlapping pictures of farmland typical of the area. At Harefield, (not quite at Shepherds
Siding, but close), I was able to take 12 overlapping pictures from one location. I did this handheld, but a tripod would have helped.


Back home, I loaded 4 pictures into Adobe Photoshop, and ran
the “Photomerge Panorama” command with 4 of the images. The result on screen was amazing. The
original resolution has been maintained across all 4 images – the .jpg file
size is 24.7 meg
 |
| 4 of the above images Photomerged to a panorama. Apart from a fencepost in the front RHS, there is nothing in the image to distract the eye |
That is where I am up to thus far. I still am experimenting with the
software. Of course, the proof of the
pudding is in the eating – and unlike 12th Street Yard where we were
able to use a bubblejet printer, printing a long panorama takes special handling. I am aware that I could send the image over
to the Backdrop Warehouse in the USA for printing, although the cost factor is
high. An Australian company may be better.
Dropz Backdrops doesn’t specialize in model railway applications, but will
print your images on vinyl, and prices appear reasonable. I recently was advised that Office Works can
print a 24” x 48” (approx 600 x 1200mm) poster from your digital image for around $60. So assuming that I can layer two panorama
images on the one digital image (each panorama to be 12” x 48”), combined that
would give 2.5 metres of backscene.
Before too long, I am going to have to do a small scale test print (say 50%), to limit my losses if
things go astray. But, assuming it
works, a photographic backscene could be
the way I will proceed for the whole layout.
If you do nothing else today, challenge yourself to try new
things. Until next time
Hi Rob
ReplyDeleteFrustrations I have had with doing backdrops of rural scenes.
1 - Time of year _ Spring Summer, Winter or Autumn - Once I decided that I had to line up the rest of the scenery
2 _ Getting printed - correct colour , background that don't shrink
3 Attaching it to the background.
4 Making sure its in the correct perspective
5 Backgrounds that fade
Please let us know how you go with this part of the experience
Hi Rob,
ReplyDeleteJust been looking through your "Backscene for Shepherds Siding" and found some material of great use to me on my layout "Brolgan Road" based in the Central West of NSW.
I should have done the backdrops some time ago but I think it will still be achievable using the techniques you have described. I have a local signwriter of the modern variety - prints to self adhesive film and I will experiment with that.
We will be going back to Parkes for a visit later in the year so I will take camera and tripod to see if I can get some good panoramic shots of the highest possible resolution.
Also enjoyed your photos of Cooma which is just over an hour away from home. There is a lot to be harvested from the detail in those photos - many thanks.
I will add your blog to my favourite if that's OK.
Regards - Rick (https://www.ozsite.com.au/brolganroad/)
I thank you Rick for your most welcome comments. Sharing ideas, and techniques is what the Blogs are all about. I certainly don't know everything, and am indebted to those who make the effort to educate me in all things modelling. Good luck with your experiments
Delete