Sunday, 14 August 2022

Wagga Wagga Station - a little detailing

 Wagga Wagga station - detailing starts


I have a confession to make.  The Wagga station has suffered some neglect over the last 3 months, whilst I have concentrated on other things - some alas not related to trains.

4204 sitting in Junee yard at the beginning of August.  I first photographed 4204 in Canberra in the early 1980s, during its last NSW government revenue run.  It is great that the loco was not scrapped, and fully restored for excursion work.  This is one of my first pictures with my new Samsung A23 phone - and the quality is far superior to my earlier 7 year old Samsung phone.

This blog post shows some of the little details associated with the station


Toilet block building showing the fence, and storage area.  This picture was taken during the last refurbishment of the station - the brick walls under the render are also visible


The toilet block building cage was made using brass strip, wire, and a LOT of patience

There are a few fences required.  I had some plastic fences in my stash, but frankly, they would have been rather heavy, and distracting.  The cause of one of the delays in progressing the Wagga station, was locating some fine brass fences.  The brass fence acquired via Ebay after a lot of lookibg is much better, whilst still not right, is far better than the plastic ones.


Seats on the platform side


The Wagga station has at least 10 Station seats.  I could only find 7 in my stash.  I believe these are Peco OO - and come moulded in a ghastly green plastic.  I have painted them blue, with black supports.  Not correct, but will do until better examples are obtained 

Luggage carts awaiting use

The etch for the Wagga station awnings, included some extra bits that Ross Balderson had added to fill up the empty spaces.  Two of those spaces were luggage carts.  These are not quite the same as the carts I had photographed, but I won't be too critical

The near disaster

I don't quite believe this happened.  I was replacing the ceiling access panel in my workroom, after it had dislodged after an extremely strong wind entered my workroom, and blew the panel (just a piece of chalk board) into the ceiling space.  In the process of putting it back, the panel dropped through the hole, and in an effort to arrest its fall to the floor, I invertantly directed it to impact the table the station was on.

"Whoops"....(the explicitive has been removed)

The impact of the ceiling access panel was onto the table, and the panel came to rest over the station - only being stopped from forming a pancake of the station by the shelving behind the station.  The station reacted to the force by returning to a set of subassemblies, with some roof sections bouncing into the chalk of the ceiling panel, causing the damage seen.  The front entrance etch was also slightly bent

Assessment, repairs, and cleaning was not immediate.  I walked away for an hour before returning to assess.  I was pleasantly surprised how little damage actually occured.  The only part that really suffered was the roof ridge of the LHS gable - seen in the above shot as white - partially the chalk, partially as the styrene ridge plastic has been removed, exposing the unpainted corrugated styrene.

Anyway, after this, I realise that I have to finish the station sooner, rather than later, and then build a protective cradle, so the station can be stored away from flying ceiling access panels etc.

Diorama resumes.


The first steps after the station was "restored" (I still have to respray the roof area) was to secure the concrete paths made previously.  The roadway curb requires a concrete gutter.  I masked a strip on the roadsurface, hand painted the concrete, and removed the masking.  Then the concrete paths were glued with whiteglue.   

Other modelling

On30 - Outback Model Company - NBH coaches.  I had these kits for about 5 years, and sometimes one needs a distraction.  They are laser cut cardboard - fairly simple, lacks details, but could be enhanced with metal handrails, rollup blinds, and passengers with legs hanging out of the windows

A casula hobbies brass/composite kit - grey primed.  It will be good to get this finished - been at least 30 years.... 

Lyndon Trains - 6 ton cane bins in HOn30.  Gavin from NGDU had asked me to build these for a future "Items of Interest" in that magazine. The etches were produced by Badger Bits - I believe using the same etcher that etched the veranda etches for my Wagga station.  VERY NICE

OCY etc container wagons.  I bought these foolishly at a recent Trains Planes and automobile auction. They were cheap. Unfortunately, they arrived extensively damaged, as the packers had put them all into a large plastic bag, not individually wrapped.  I have cosmetically restored them,  repainted over the previous horrible paint, and added some weight.  Containers and kadees will be needed too.  May make a block train on the future layout - but don't look too closely. 


Last Saturday, I travelled over to Murrumbateman for the Div 2 NMRA meeting at Stephe Jitt's MMR new house.  Stephe had found a house with a big train room to accomodate his Kangaroo Valley railway, albeit with some modifications.  I took the opportunity to take some better phone camera pictures of some of the sections, relocated from his previous obode in Yass.  Stephe tells me that he hopes the layout will be fully operational again in 3 years.  Knowing Stephe, he is conservative with his estimates


Well, that's it for now.  Lessons I hope have been learnt.


Monday, 11 July 2022

Docker Street - Gatekeeper Cottage

 Gatekeeper Cottage for Docker Street - 1


It has been a number of years since I wrote an blogpost on the gatekeeper cottages around Wagga. 

https://buildingwagga.blogspot.com/2019/03/gatekeeper-cottages.html


My picture of the cottage is from 1997, the former headshunt for the sidings beyond Docker Street has been removed - the original alignment was between the rail, and the paling fence

In the subsequent time since that original blog, I have been accumulating additional pictures.  The Docker Street cottage was one I don't have plans for, and as the cottage is privately owned, these pictures will be used to create a simple diagram for a future model build.

An earlier b&w picture showing the headshunt

A set of pictures taken from the Lost Wagga Wagga facebook site. These pictures have a wealth of detail, from the lineside poles, gates, and trains. It however, does give a minor contradiction - that is the date the boom gates were installed.  My earlier 1959 newspaper article on the Edward Street crossing said that boom gates were in place on Docker street - but the 1960s cars and manual gates show a different story 

Another image from the Lost Wagga Wagga facebook site - this shows the installation of timber flangeways on the headshunt - dated 1965. I suspect that this was work involved with widenening the roadway, as part of the work for the boom gates.  Absolute classic showing the attire of the workers, and the foreman

Another angle of the cottage from 1997

2002 is the date - southbound train on the crossing.  The cottage is not visible, on the left hand side of this image. My picture

A further pair of images pinched off the  Lost Wagga Wagga facebook site.  The gatekeeper cottage from this angle looks unchanged in the intervening 80-90 years


A set of pictures taken last month, with my poor phone camera, in poor lighting conditions.

A 1971 aerial view of the cottage.


A more recent aerial shot - this one from sixmaps

Making the plan.

The aerial shots both are dimensioned, but I was able to get a more accurate measurement by counting the corrugations on the roof.  Each corrugation is 3" apart - and thus I was able to determine the full width of the cottage roof is 40 feet.  A little more guesswork for the wall heights, and roof pitch.  I took these from a plan I did have of the old  Best Street cottage, which has some similar features.  What I don't have is any pictures of the door and window placement from the north eastern side of the cottage, so I have made a guess.  I suspect too that the structure is rendered double brick construction, apart from the rear "lean-to".  


Anyway, that's as far as I have got for now.  Cutting out the styrene will be the next stage.

Stay warm


Sunday, 12 June 2022

Footbridges

 Wagga Wagga railway footbridges.  

As part of the Inland Rail upgrade, both footbridges crossing the railway in Wagga are going to be replaced. 

Mothers Bridge.

I am not sure why the footbridge connecting Railway Street to Station Place was called this, but it is ideal as a railfan viewing platform.  It doesn't provide any passenger connection off the station platform


June 2007 - railfans line up on the bridge for 3801's arrival. This is the view looking east (towards Sydney)

A 1934 NSW Railway department drawing shows the bridge - looking west.  Some changes have been made to the northern ramp, but generally there doesn't appear to have been many changes


Fortunately, I don't need to measure the bridge, as the above plan, when enlarged, shows the dimensions quite well

At the Station Placeend, the original ramp has been kinked, to provide for the enlarged roadway


The railings are attached to the uprights with "U" bolts


Cassidy Bridge

Lost Wagga Wagga facebook site occassionly provides some interesting Railway related material


Looking west. Note the lineside poles get much taller as they get closer to the footbridge


Looking east - poor picture, but does show the Best Street road bridge

Mount Erin school in the distance.  The closeness of the school was the main reason for the bridge to be built


At this stage, I do not have a firm idea of the width of the baseboards, so making either bridge may be premature.  But at least I have pictures - and their replacement by Inland Rail should not impede my modelling of them.

An excusion to Cootamundra by Railcar

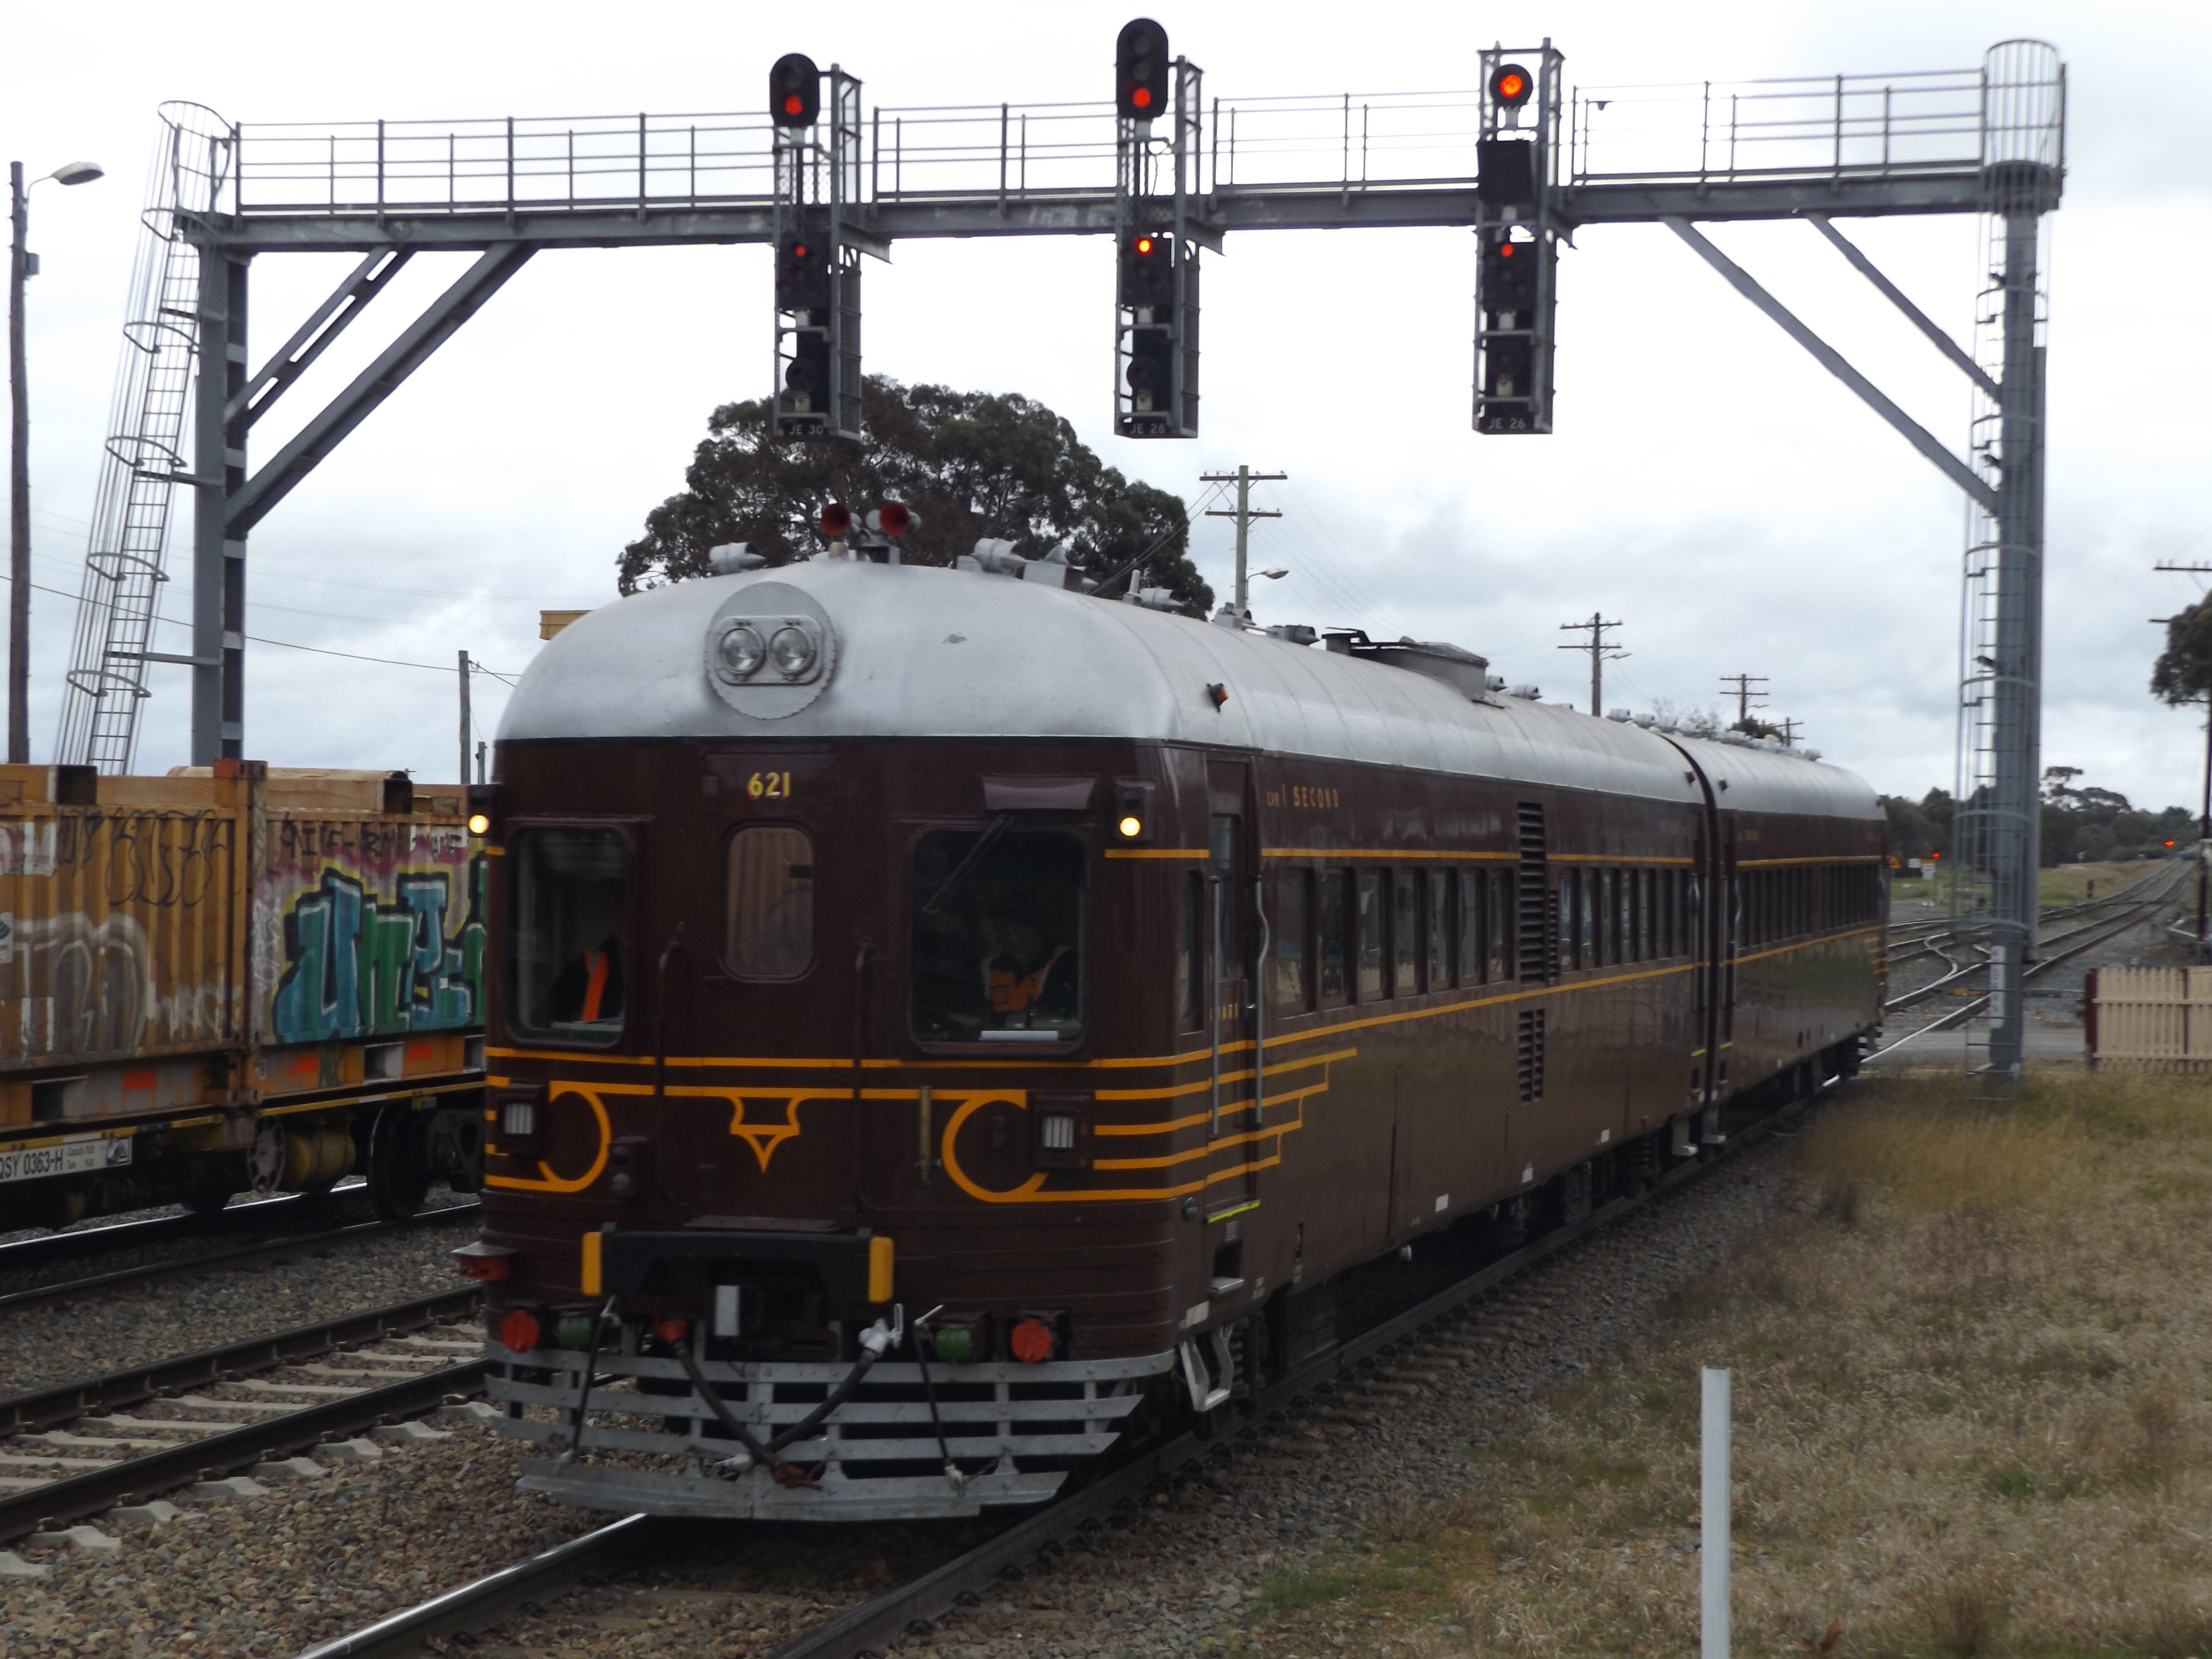
Yesterday (Sunday, June 12), I had a pleasant ride on restored 621/721 railcar to Cootamundra and back.   The railcar was supposed to arrive in Junee at 10:22 - but there were some unplanned interuptions, which made for some extra photo opportunities


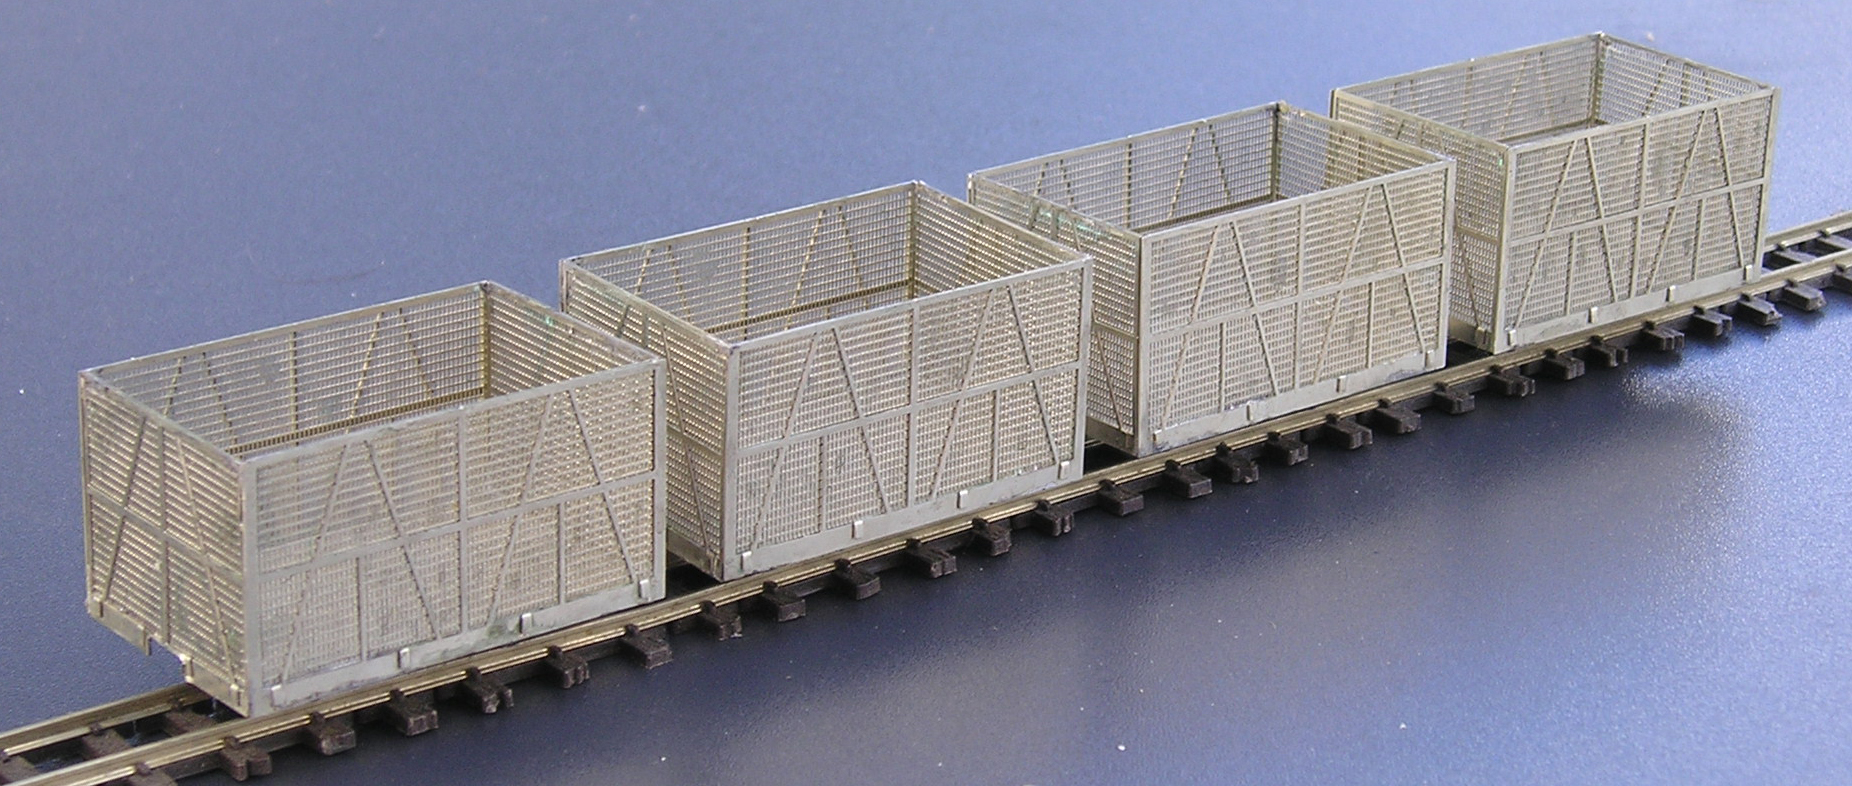
The Down steel train suffered a major engine fault, and it was sidelined to the old disused platform road, awaiting a replacement engine.  Traversing the crossovers was taken slowly.  Once stopped, I could take some pictures - particularly the "out-of gauge" wagons.

Following the steel train, came the VISY container train.  This train is broken up in Junee yard, and shorter shuttle trains are then sent to Harefield Intermodal yard.  I get to view (and hear) these shuttle trains - regularly hauled by alco power, heading up the 1 in 49 grade out of Junee.


I understand, after  speaking with the driver of the Visy Train when we returned from Cootamundra, that one of the engines was taken off the Visy train, and added to the Steel train.

We still had longer to wait for the railmotor.  The Griffith Explorer train was also running late and had priority.  

Approaching the platform.  The train from Griffith has to reverse direction once it arrives in Junee


Finally, the 621/721 railcar makes an appearance - around 40 minutes late - the Griffih Explorer trundles past, heading north.  The old and the new.


621 aqpproaches Junee platform.  The Railmotor society have done a real good restoration


Interior View from my seat - the internal bulkheads are for the engine in 621.  Not sure I ever remembered blue seats when I travelled on these in the late 1970s.   


With the weather so gloomy, there was little point in trying to chase the railmotor back to Cootamundra in the car, in the hope of capturing a great picture.   In any case, it was a good day.

Until next time