Showing posts with label bethungra loop. Show all posts

Thursday, 21 May 2020

Bethungra moves back to the Museum

Bethungra Loop - in N scale.   Layout returns to the Junee Broadway Museum

With the relaxation of COVID restriction, Bob and his son helped me relocate the layout.

As the layout was never designed to be "portable", I knew it was going to be a bit awkward.  Bob brought down his trailer (for the collapsible table).

The main board in the back of my 7x5' trailer.  Note the long backscene has been removed, and the back tray of the trailer is in the lowered position.  Ropes were attached to the unsceniced end to hold the layout firmly to the front of the trailer.  The trailer's cage was then wrapped in a tarp, to reduce the effect of wind damage. 

Bob is also the artist who will be painting the backscene.  Before we did anything, I ran a train, and Bob also marked out the distant hills profile on the backscene with white chalk

The wiring from the extension, to the main board was disconnected, and the two sections separated. The extension benchwork was maneuvered into the back of my Honda, but the main board was not going to fit my trailer unless the long backscene was removed

The extension on its side. 
The fixed legs meant that the extension was a snug fit  in my Honda CRV.  This is not a layout that was designed to be frequently moved. 


The 4km trip to the museum was easy, and I stayed below 50km/h to minimise any adverse effects from wind.  Then came the interesting exercise of getting the layout back into the room.

This involved moving the main board through a window opening into the "train room", and the only damage, was one of the trees was dislodged.  (A simple fix).

In the train room, the layout was reassembled in situ  As expected, there was some leg adjustments for the uneven flooring.  Reconnection of the electric wires, power pack, and a test train was run around successfully.

The corner of the "train room" showing the layout, and a selection of railway posters in the room.  Please note, the missing backscene (awaiting the artist touch), AND that the room has not yet been painted after repair of the plaster.  But I hope that the new Bethungra loop layout will be the impetus needed to finish the room.


As painting the backscene is simpler for Bob without having to lean over the layout, the backscene was left off.  The museum is also hoping to get the Perspex front installed, the electrics, and curtains fitted.  I am sure they will want to do some other "improvements", but I think my work is done for now.

Monday, 27 April 2020

Bethungra - a finished N scale layout?


Finally finished (?)
When is a model railway layout really completed?  I have been debating myself on this topic for a while.  Should I spent the extra effort to add many small details, and thus delay working on my Wagga layout/models, or do I stop working on the layout once it has reached an acceptable functional standard?

View from the northern end, looking south.  The up and down tracks on the left weave to gain clearance for the crossover bridge. The level crossing is also not quite complete


My answer is at the end of this update

Fascia board
The white foam visible on the front fascia was always meant to be covered.  My original idea was that I could paint a suitable fascia colour on the future perspex.  Well, without the perspex, this was not a good idea.  So I fashioned up an MDF profile to hide the foam, and after fitting, found  gaps that needed to be filled with more scenery.  It would have been better to have installed the fascia earlier, so I wouldn't have had to try and match existing terrain.

The colour was a representation of the "red brown" clay that is typical of this area.  A 250ml sample pot from Bunnings, and a roller to apply.

What did we do without grip clamps?

Fascia board installed - secured with screws and painted.

Wiring considerations
The H&M clipper control had previously been placed above the layout, with wires running direct to the track.  Whilst this was OK for testing, it was not going to work once the perspex was added to the front.  So I made up a shelf under the extension board out of scrap timber.   The control to activate a train has been agreed with the Museum.  Using a Clipsal “push button” timer light switch,  will activate the clipper transformer.  Being 240 volt, this needs to be wired by a licensed electrician, so I will leave that task to the Museum.


The other way to do it is to wire this plug up to the controlled 12 volt wires leading to the track.  This doesn’t need an electrician – but it also means that power is constantly on to the Clipper, and relies on the Museum volunteers to turn the 240volt AC supply on and off.  Risk of fire from an overheated transformer is significant, so whilst there is more cost with the electrician, safety is the route forward.

I am assuming that the museum will want to install curtains at the bottom of the fascia board to hide the transformer, and wiring.


Cleaning track.
As trains had not run on the layout since I started scenery, there was around 13 metres of track to clean.  Some of it had been affected by glue during  the ballasting.  So armed with my block of wood, I slowly polished my way around the circuit.  I do not use an abrasive cleaner, as this introduces scratches into the surface of the rail, and becomes a groove where dirt can accumulate.  The tunnel scenery inserts were popped out to expose the “hidden” trackage.   A vacuum clean then picks up any loose ballast etc.

The tunnels, after removal of the inserts.  
The 4 tunnel inserts resting in the middle of the balloon loop whist the track is cleaned in the tunnel.  The balloon loop area has been deliberately not sceniced, as it does not represent the actual loop at all.  It could be used for a small display by the Museum,  The inspection train waits patiently for clearance from the railway authorities. 


Test run.
I own a few N scale locos that need good clean track to run.  So these are the best locos to test the track.  All was going well, until the loco stalled in the tunnel.  Turns out that one of the tunnel scenery inserts had too much foam extending downwards from the tunnel roof.  Very easy to fix.  There was also a fair bump over the track join between the main board and the extension.  An adjustment on the screws holding the track  alignment plate in place, cured this.   Once I had a few laps under my belt, I added a couple of test carriages and again, a few more laps.

Carriage modifications.
The Passenger carriages all used Rapido N scale couplers mounted on the bogies.  All the museum locos use microtrains couplers.  So I converted one end of a passenger coach to microtrains.  I cut off the Rapido coupling off the bogie, and body mounted a microtrains coupler direct to the underside of the coach end.  Amazingly, the coupler height was spot on.
Obviously, this modification also needed to be tested.  The best running loco in the museum fleet is an Atlas GP38.  After coupling the carriage to loco, a few more trips around the layout were successful.
------------------
A layout tour.

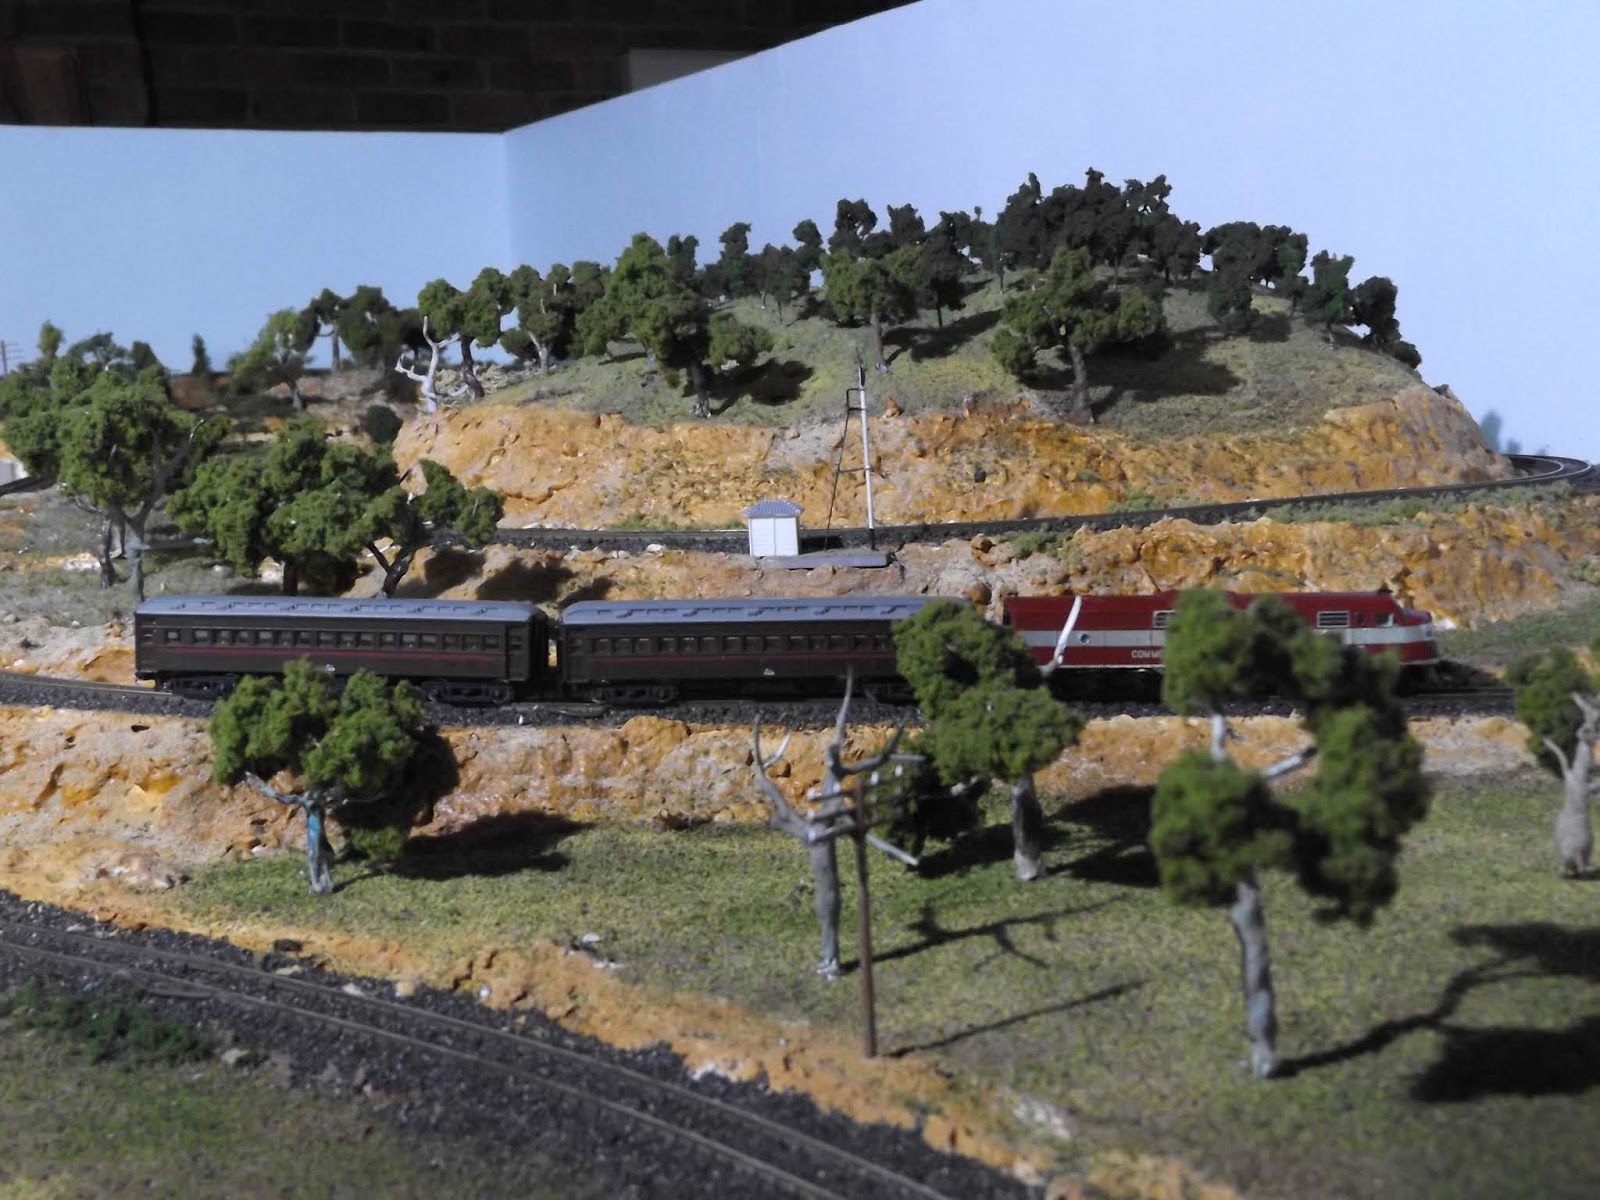
The official inspection train, emerging from under the crossover bridge.  The GM class locomotive was kindly donated by Peter Dinham, of the Canberra Monaro N scale group.  The coaches are Kato, and if you really look closely, are of Japanese prototype.
Our train passes over the #1 tunnel

Continuing down the hill, the other 2 tracks are for the spiral.
As before, the track at the bottom of the hill is not sceniced, as it is purely there to turn the train back up the hill.
Our train starts it climb up and around the loop - about to enter #1 tunnel
A view of the loop, showing the unsceniced section (the white foam, and no ballast track) at the back of the hill.  I couldn't really justify spending time on an area that would not be seen form normal viewing angles. The train  has climbed the hill.
The train passes the upperquadrant signal, and relay hut.  The upperquadrant signal is one feature I recall from my early days of riding trains to Sydney, as it really stood proudly against the sky, as viewed from a train carriage window from the lower track.  Both structures are scratch built, and sadly, the upper quadrant doesn't operate  
Our inspection train heads towards the crossover bridge
After crossing the bridge, the train hits a downgrade.  On the real Bethungra  loop, the bridge is a below deck girder, and the track continues for some time on a rising grade, until reaching the level crossing.  But compromises have to be made, to squeeze, and compress the model to fit a tight space in the Museum. 
Finally, our train reaches the olympic highway level crossing, and end of the scenery

The Museum owned  NSW freight train drifts down the hill.  It would be nice if they had more than 4 NSW freight wagons.  


What lessons learnt
Construction of a model layout has refreshed a lot of my skills, and allowed me to try out some ideas that could be used during the construction of my Wagga layout.

- Install the fascia early, not after the rest of the scenery has been done
- Polystyrene foam  is effective for creating landforms, but messy to work with. Hot wire works, but extruded foam may be better than white beaded foam
- Storing things for 20-30 years on the offchance you will use it is false economy.
- Sculpt-it “plaster” is excellent for rough rockwork
-  Large areas of scenery are not something I enjoy building
-  I am not a fan of tree making
-  Forced perspective works nicely
- Hidden trackage MUST be accessible
-  I need more experimentation with my static grass techniques

It was good to put some theories into practice.  Perhaps the best advice is to trust yourself, for even if it doesn’t work, you will learn something. 

Probably my favourite angle to view the layout.  The forced perspective on Bethungra hill is quite effective, and the shadows from the trees along the road looks good.  (Sorry to show the clutter in my garage - spoils the illusion).


The answer
It has been been 9 months since I accepted the challenge to rebuild the Bethungra Loop layout for the Broadway Museum, and I think it is time for the layout to return to the Museum.  I have contacted them, and they are arranging the transport.  However, with the current COVID19 restrictions, this may take a few days (or weeks), so I will keep adding details until then.

Stay safe.

Sunday, 12 April 2020

Some more tree planting

Tree planting (again)

To try and make this small N scale layout feel larger, I have employed a technique called forced perspective

Almost all of the sceniced part of the N scale Bethungra Loop layout is visible in this picture.  This is the angle that many visitors to the Museum will see upon entering the door of the Railway exhibit room.  The height of the trees recedes into the distance, and I hope makes the layout seem bigger than it is.


Normal perspective means that things a long way away, look smaller.  Forced perspective means building models in a smaller scale, and placing them in such a way that the eye is tricked into thinking they are further away than they are.

Making trees smaller than N scale has taken longer (much longer) than I hoped.  The Chinese made 3cm high trees (as planted on top of Bethungra hill) have been covered earlier.  But these were too small for the medium distances, and I didn't buy any more.  The 5cm high wire-wound trees were the subject of the previous blog post, and I was itching to see how they would come out.  I also needed something to fill in the extreme rear of the layout - something that would not have much detail.   I had seen puff ball trees used to great effect on many USA layouts, and thought I would try to make some of my own.

Puff Ball Tree Making

The ingredients.  Woodland scenics Poly fibre, coarse ground foam, spray adhesive, cheap hair spray, an ice cream container, and something disposable to act as a mat.
Pull out the polyfibre into rough shapes.  Tease out as much as you can. 
Ground foam poured into the ice-cream container.


The method is simple.  Spray adhesive onto the polyfibre shapes on the "disposable mat".  Then turn the shapes over, and spray some more.

When sticky, drop in the polyfibre shapes (one at a time) into the foam filled ice cream container.  Move the shape around until all the sticky fibres are covered in foam.

Remove from the foam, and using the hair spray, spray the foam covered shape, place back onto a "dry mat" (Don't use the one you earlier sprayed glue onto)

Repeat until all shapes are covered in foam.

Pour the unused foam back into the ground foam container
Trees and bushes come in all sizes.


Any foam that happens to be dislodged on the "dry mat" can also be collected and reused.

Plant your bushes on top of a dab of white glue direct onto the scenery.  Wait to the glue dries.

-----------------
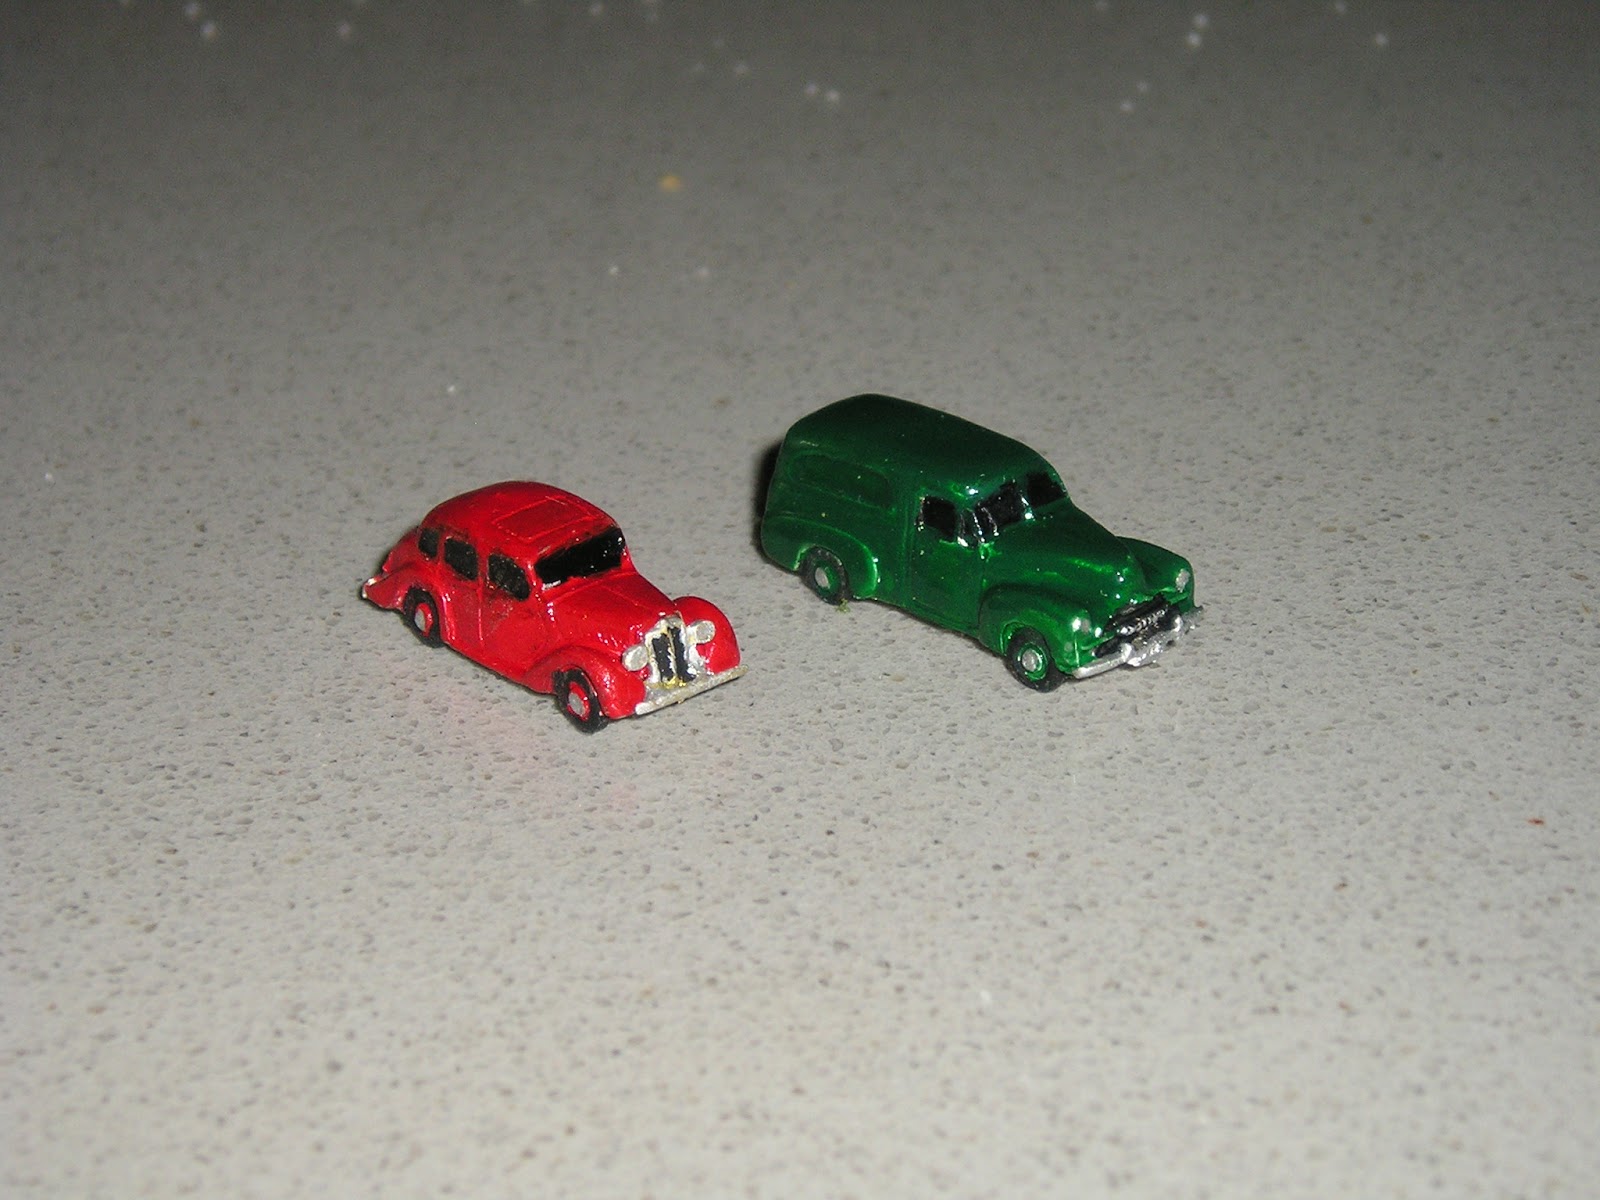
The N scale convention last October in Canberra provided the delegates with a number of neat "give-aways" as part of their registration pack.  One of the items I received was a Rosco brand N scale FX Holden panel van.  A mate, who didn't model N scale, then gave me his model, an MG Sedan.  These come as unpainted white metal lumps.  N scale cars  are seriously small, but I think my painting skills are OK.  Although it was suggested, 2 tone duco on the MG, and signs on the side of the van would have had me searching for the phone number to the funny farm. 

----------------------------
The first bit of perpsective planting was my quick and dirty trees on the embankment leading to the bridge.

The FX Holden, and some of the puffball trees on the backscene behind the tracks.  Trying a shadow effect to simulate the late afternoon sun was probably not that effective 
More tree planting in the distance.  The puffball trees are blending in quite well.  I have also planted some of these closer to the foreground, and they look a bit like bushes.  Can you also see my wirewound trees in the distance?  The MG gives the road a purpose.  I really need to paint the tunnel portals before too long
Contrast this picture with the one from last blog on ballasting.  Puff-ball bushes, and reduced scale wirewound trees don't look out of place to my eyes 


Still to be done

I have a few more trees to be planted, and there is a lot of line-side weeds needed to cover up some of the white foam/plaster that has unfortunately come through.  The lineside telegraph poles need to be placed.  The tunnel portals to be painted.  Then I need to tidy up the electrics, simple as they are, they really are unsuited to a museum display.  Plus more servicing of the locos, and trains, and test running.

The Broadway Museum is currently closed due to COVID-19, but I need to get the layout down there, so that they can work on the backscenes, and perspex.

Final thoughts.

Sharing your modelling via blogs, website, social media, email or magazines,  is one way to stay in touch during these times of social isolating and lockdowns.  It is more important than ever to maintain these links.  And, try something new, learn a new skill.  Get stuck into a project that you have been putting off to a rainy day.  As someone has said, when you are given lemons, make lemonade.  May everyone remain safe.  Thank you

Tuesday, 24 March 2020

Bethungra - some thoughts on Trees, and Ballasting


Bethungra layout – Ballasting and tree making

Experimenting with tree making has slowed me down a lot over the last month or so.  The first lot of trees I installed, were those supplied by the Junee Broadway Museum, coming off their original now dismantled layout.  I have almost exhausted this supply.    Checking the ebay lists for more was disappointing.  Whilst I did find some more of the 3cm size I used for the Bethungra Hill, the bigger size  for foreground trees were far too expensive.  However, the size of the trees that I needed for the scenic forced perspective effect is around 5cm high, and there was very limited selection of any tree type in this size, let alone of gum trees


A small group of trees fairly typical of those on the south west slopes of NSW. 

Start of a windbreak.  Juvenile trees planted after the 2006 Junee district fire are around 13 years old
More trees in a sheep paddock

 This tree has a quite white bark, and an open canopy of leaves.  It was the inspiration for my initial efforts


The area around the Bethungra loop is open woodland, and farming, and this is what I am trying to simulate with the tree planting for the layout.
I am not a botanist, but eucalyptus trees (gum trees) are not the same.   Some of the varieties of trees near Bethungra Loop are Yellow Box, Forest Red gum, Blakely’s Red gum, Kurrajong, Ribbon gum, and Snow gum.  Then we have shrubs, like Cootamundra Wattle, and bottle brush.  A combination of the above would be most effective

A great little booklet, with colour photos and descriptions of 80 types of gum trees


I am not an expert when it comes to making trees.  Australian Model Railway magazine has had a few articles over the years.  (Check their on-line index for "trees").  If you are using real plants, the best looking gum trees are made out of dried sedum flower heads but these to me look mostly like alpine ash (Eucalyptus delegatenis), and besides being fairly large, probably not suitable for Bethungra.  Seafoam (Heki) can also make some good trees, and there are a few great you-tube videos by Luke Towan on the subject.  I was told that you can buy seafoam in Australia, but "out-of-stock" was all I found.  

So after finding no suitable trees on ebay, my options were to make my own using the twisted wire method.
A selection of tools.  The wire I used was automotive - and contained 20 strands of copper

After cutting and stripping off the insulation, the 20 strands of wire were twisted into tree shape.  (An ideal task whilst watching the TV)  I have included a ruler to show the size of the tree.  Size is roughly 5cm high - around 8 metres in N scale.  This would be around half the height of a mature tree.  I am planning to install these in the background as a forced perspective trick


The trunks were then dunked into household flat plastic ceiling paint that was otherwise well past its use-before date.  Previously I had decanted around 2 litres into a plastic bottle, and poured a small amount of paint into a KFC plastic cup.  Once the trees were dipped, small droplets may form on the branches, and touch these with a brush and allow to dry.  The paint in the KFC cup poured back into the bottle.  The trees dry quickly, and the paint is flexible, so the branches can be rebent.
A dirty wash of used turps gives some colour to the branches.  The green foliage is  from Woodland Scenics, cut, and teased out and attached to the branches with white glue.  I was reasonably happy with the end tree, although the wire heritage is visible, and each one has taken me close to an hour to make.

 
One of the original trees from the old Museum layout.  They had been made using the twisted copper method, although with heavier copper wire.  The builder of these had used no-more-gaps to give the tree trunks some bulk, which complemented the heavy foam that is used to form the leaf canopy. 


There were quite a number of "dead trees" in with the museum supply.  I tried the Woodland scenics foliage on the dead trees to see if that would work.


In the effort to speed up tree making, here are some quickies.  They are basically woodland scenics foliage on a stick. They take under 10 minutes each.  Grouped, in the distance, they will probably be OK..


The Woodland Scenics foliage has an unfortunate characteristic, in that a lot of the foam in the fibre mesh is loose, and liable to fall out.  To counter this, I spray each tree with cheap hair spray.


Ballasting. 

Much has been written in the model press about ballasting.  Ballasting is not a without risks, so I thought I would share some of my experience.

         - Make sure the trains run properly before adding ballast
         - Adding ballast can create track problems due to expansion and contraction of the rails due to temperature changes
    Ballast can interfere with flangeways.
    -  Loose ballast can find its way into loco mechanisms
    - Gluing the ballast will add noise to train running
   Poor gluing can cause points or switches to stop working.
   Some ballast contains unwanted impurities, which can promote corrosion
   Ballasting too early can make scenery work harder

A successful model railway can be made without ballasting, but it is not finished without ballasting.

As our hands and tools are not scaled, most ballasting techniques will need clear space.  So, before I plant any trees close to the tracks, I needed to ballast.

Basic tools.  I transfer the ballast into a resealable container, as a nick in the plastic bag the ballast is sold in leads to a mess (ask me how I know). A film canister to pour the ballast onto the track.  A spray bottle to wet the ballast  The diluted whiteglue, and detergent mix in a jar, the pipette for transferring the glue to the ballast, and a brush, and stick to ensure that no ballast gets attached to the inside running rail of the track 

The area of track to be ballasted.  Basic scenery has been completed

After pouring the ballast onto the track, but before shaping.  You can buy  tools to pour and shape the ballast in one go, but there is something satisfying to use your finger to bulldoze the ballast into the gaps formed by the sleepers.  Remember, it is easy to add more ballast, and harder to remove - so take your time.  The brush and stick can then be used to clear the inside track running rails of any ballast  before gluing. A fingernail works too

Once happy with the ballast shape, mist the ballast with your sprayer.  Then, flood the ballast with your diluted white glue mixture.  I find the pipette very effective in dropping the glue exactly where it is needed.  The earlier painting of the track (covered earlier in the series), makes the oversized track "disappear".  Allow to dry for around 24 hrs
Another section of ballasted track.  The line of the original cork underlay is unfortunately visible, but one could add a bit more ballast, or some weeds to hide this.  The railhead needs to be polished too, before running a train.  I try and not use an abrasive  track rubber, but masonite is a good alternative with a little more elbow grease.


The last thing I do before returning to the scenery, is to locate, and remove the track fixing pins.  The ballast holds the track a lot better than the pins in any case.  If you ever need to adjust the track, the last thing you need is to have a pin preventing it being moved. 


===========================

A lot has happened world wide since I wrote my last Blog-post 3 weeks ago.  The COVID-19 coronavirus will have a different impact on the lives of all people, and we are all heading into the unknown.  But it is times like this when having such a great hobby as model railways, allows one, for at least some time, to escape to an alternate world that you have made.  In these troubling times, stay safe, and hopefully, we will all come through this a lot wiser.