Kyeamba Creek Bridge – Scenery
Trying something new could be the title of this post. Finally made a start on the scenery.
 |
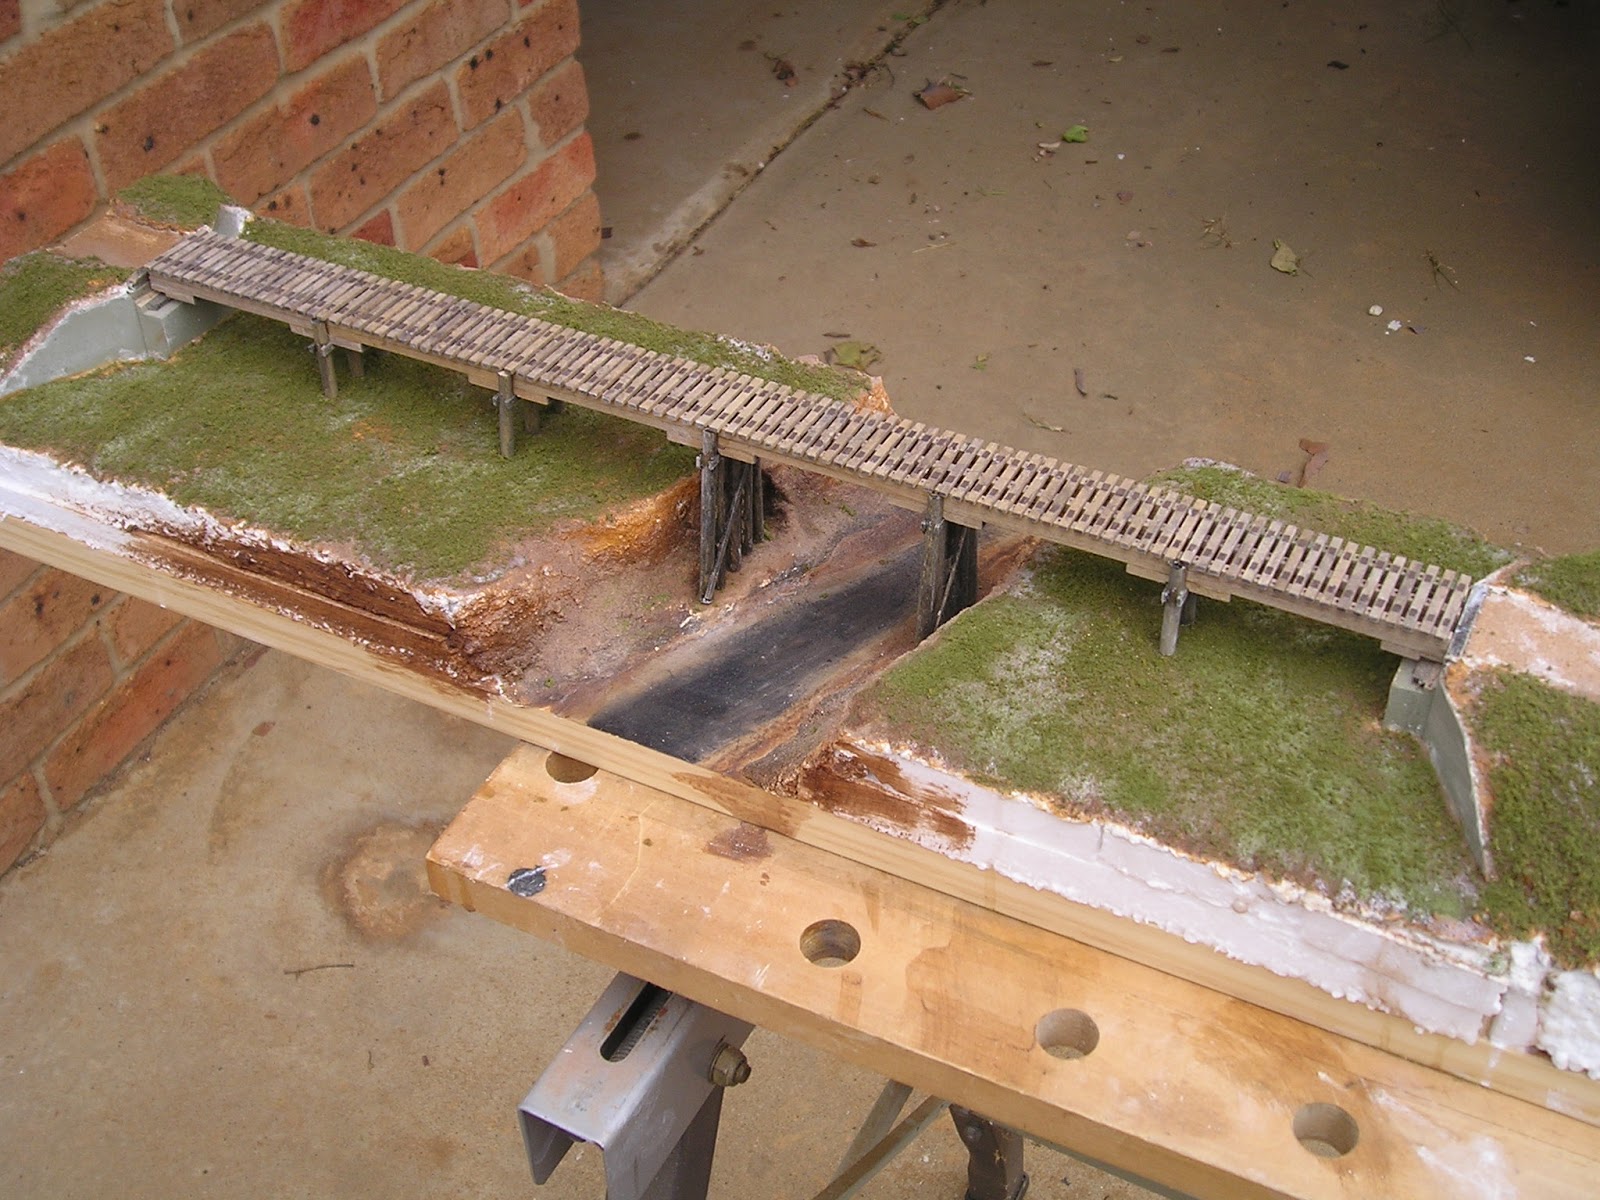
| Unnamed creek bridge on its new piers |
 |
| Unnamed creek bridge floats above the baseboard between its pair of timber abutments |
 |
| Timber blocks added to support the bridge piers |
 |
| Polystyrene fitted to the unnamed creek bridge area. Note the abundance of foam for the embankments |
 |
First layer of foam for the main creek trestle. The embankment foam has been cut, and roughly shaped in this view.
|
I used white polystyrene, primarily because I had it on hand. It is not the most pleasant of material to work with. Hot wire cutters could be used to cut and shape the foam, but a knife, saw, rasp, and sandpaper works too. Ensure a vacuum cleaner close at hand to collect the
white beads
 |
| Unnamed creek bed after sanding. My intention is to model this as a dry sandy creek. |
Sculpt-it modelling “plaster” obtained from Office Works. I had to order this product in, as Wagga’s
Office Works does not stock it. The
“plaster” is mostly very fine plant fibre, mixed with dry glue, and possibly
some clay. If I had to say what the
plant fibre was, I would guess it is powdered newspaper – anyone who pulped
newspaper for the old K-Tel brickette press would have a fair idea of the feel
of Sculpt-it once water is applied.
Water is added, and mixed to form either a thick porridge consistency, or with more
water for a thick soup.
 |
| Sculpt-it has a grey colour, is workable for around 30 minutes, and has the advantage of little mess (compared with plaster). |
 |
| Once the sculpt-it has dried, I painted the surface with "raw sienna" artist tube paint. The effect might be effective in a desert, but it is just the first pass. The sandy creek bottom has been “zip textured” with is a sand coloured plaster sold 30 years ago, sold under the“Tuft” label. The ZIP texture technique has been superceded with ground foam, and more recently static grass, but it still has its uses |
 |
| Kyeamba Creek also received the "raw sienna" paint I also used some "burnt umber" for the banks of the creek, and black to represent the water. What I didn’t show in this picture was that I goofed with the width of the creek, and my first attempt to reinstate the trestle bridge failed, as the banks were preventing the bridge pier to go down. Another nice aspect of the sculpt-it, was once dampened, it is easy to carve – unlike plaster |
 |
| Both bridges. This is the side that won't be seen when they are installed in the layout |
I have been a fan of Luke Towan’s scenery you-tube
videos, and Luke likes to texture the ground surface with a combination of dry
dirt, and tan grout. I followed his
recipe with the red decomposed granite that I had left over from the outdoor
landscaping, and I ended up with a pleasant “topsoil” colour. This was applied over diluted white glue that
had been painted over the “raw sienna” painted surface.
 |
The sifted dirt adds another layer of texture - the original paint is just peeking through
|
Finally some greenery – courtesy of some Faller ground
foam. Even just one colour brings things
to life. The foam was dusted onto diluted
white glue that had been painted over the surface. In my enthusiasm to take a picture, the glue
had not quite dried.
Next steps are to fill the dry creek bed with some sand
drifts to take away the roadway look, continue filling out the ground, and
creek banks with more green, clean up and disguise any white bits showing, add
an MDF side to hide the exposed foam, think about the water, plant lots of
trees and bushes, and get the track down, and ballasted.
I wish all a happy, and safe Christmas. May all your surprises be pleasant


Nice work Rob. Hope you get some more free time over the summer to continue some more scenery. Merry Christmas, Phill O
ReplyDelete