 |
| S65 passes Bomen in the 1980s |
The next stage in the construction was to dress the windows
and doorways. Resist the temptation to
assemble, until this has occurred. As
my windows and doors are not available commercially, the following pictures
show the process.
 |
| Ladies platform side doorway on south eastern side. As cut out |
 |
| Archway filed into the doorway. I used a half round bastard file |
 |
| Brickwork carved away above the door with a chisel knife blade. Be very careful with this step |
 |
| New brickwork pattern scribed into the corbels. I know this new brickwork should be flush with the surrounding brickwork, but it is extremely hard to tell |
 |
| Some styrene strips added to "bulk out" the brickwork, as the slaters brick sheet is quite thin. The one at the top was filed to the same arch shape as the brickwork. The thickened brick edges were painted to add depth |
 |
| More styrene added, to form the woodwork. The woodwork for the crownlights was cut to size from 20 x 30 thou. strip |
One down – 18 to go.......
I used evergreen styrene for all the framing. A month ago, I purchased almost every size of
evergreen styrene strip from “The
Railcar”, and having the exact sizes on hand makes the work go quickly. Whilst
it is possible to hand cut sizes from larger sheets, life is too short.
Now came the fun part – assembly, where good preparation
pays off. The base of the station was
cut from a 40 thou thick sheet, and the
walls added slowly, checking with squares.
Reinforcing with 80 thou size square strip on the corners. The station also slopes away at the rear, so
I had to bolster the front platform with yet more styrene strips. Virtually no gap in the side joins, which
only needed a quick light sanding to finish.
 |
| All 8 wall sections, and the base, prior to assembly |
 |
| Back of the station after assembly. Note the way the brickwork extends below the station base |
 |
| Front of the station. The extended station base is to accomodate the platform roof posts. Unlike most of the NSW stations, the roof extends over to the platform, rather than finishes at the station wall, with a separate awning to keep the sun and rain off the passengers. I am also toying with the idea of an interior, although getting information, and pictures is not an easy task. If anyone has any pictures, I would be grateful to know of them |
Brick painting
I tried a new technique (for me) in getting the brick
colour. I headed off to the Wagga Wagga Bunnings store, and found a colour card that I thought was really close to the brick colour at Bomen station. Then I
asked if a 250ml sample pot be made for me.
The colour selected was Taubmans “Rusty Rail” – which seems quite
appropriate for a railway station.
Back home, I mixed up a 10ml with some thinner (I had run
out of Tamiya thinner, so used Simply Glues Y6b thinner instead), and sprayed
using a badger 200 airbrush. I was very
pleased that the paint sprayed nicely. At
around $6.00 for 250ml of paint – a BARGAIN for a hobby task. I hope the paint will stay viable for a while
yet – the Bomen station lamp room/gentlemans toilet is a future build.
What did surprise me is how close the Slaters brickwork
colour was to the “Rusty Rails” colour.
Under artificial light the slaters brick looked too pink, and even Rusty Rails, which looked right at Bunnings, is a bit bright compared to pictures showing the whole station. Conclusion - Colours are fairly subjective on
a model, so don’t get too hung up about it.
After letting the paint “set” for 24 hours, I got out my
small paint brush, and carefully repainted all the trimming in Floquil Antique
white – which is a good match for the off-white colour of the station. This is one of the drawbacks of attaching all
your windows and doors prior to the painting – although I am not sure I could
have done it any other way, as there is unfortunately a bit of variation in my
handcut door and window openings.
Not quite finished the base yet. The lower concrete “barge board”,
and window sills are to be applied; then
add the mortar lines, and the windows and doors.
 |
| rear of station, with cardboard mockup roof. |
 |
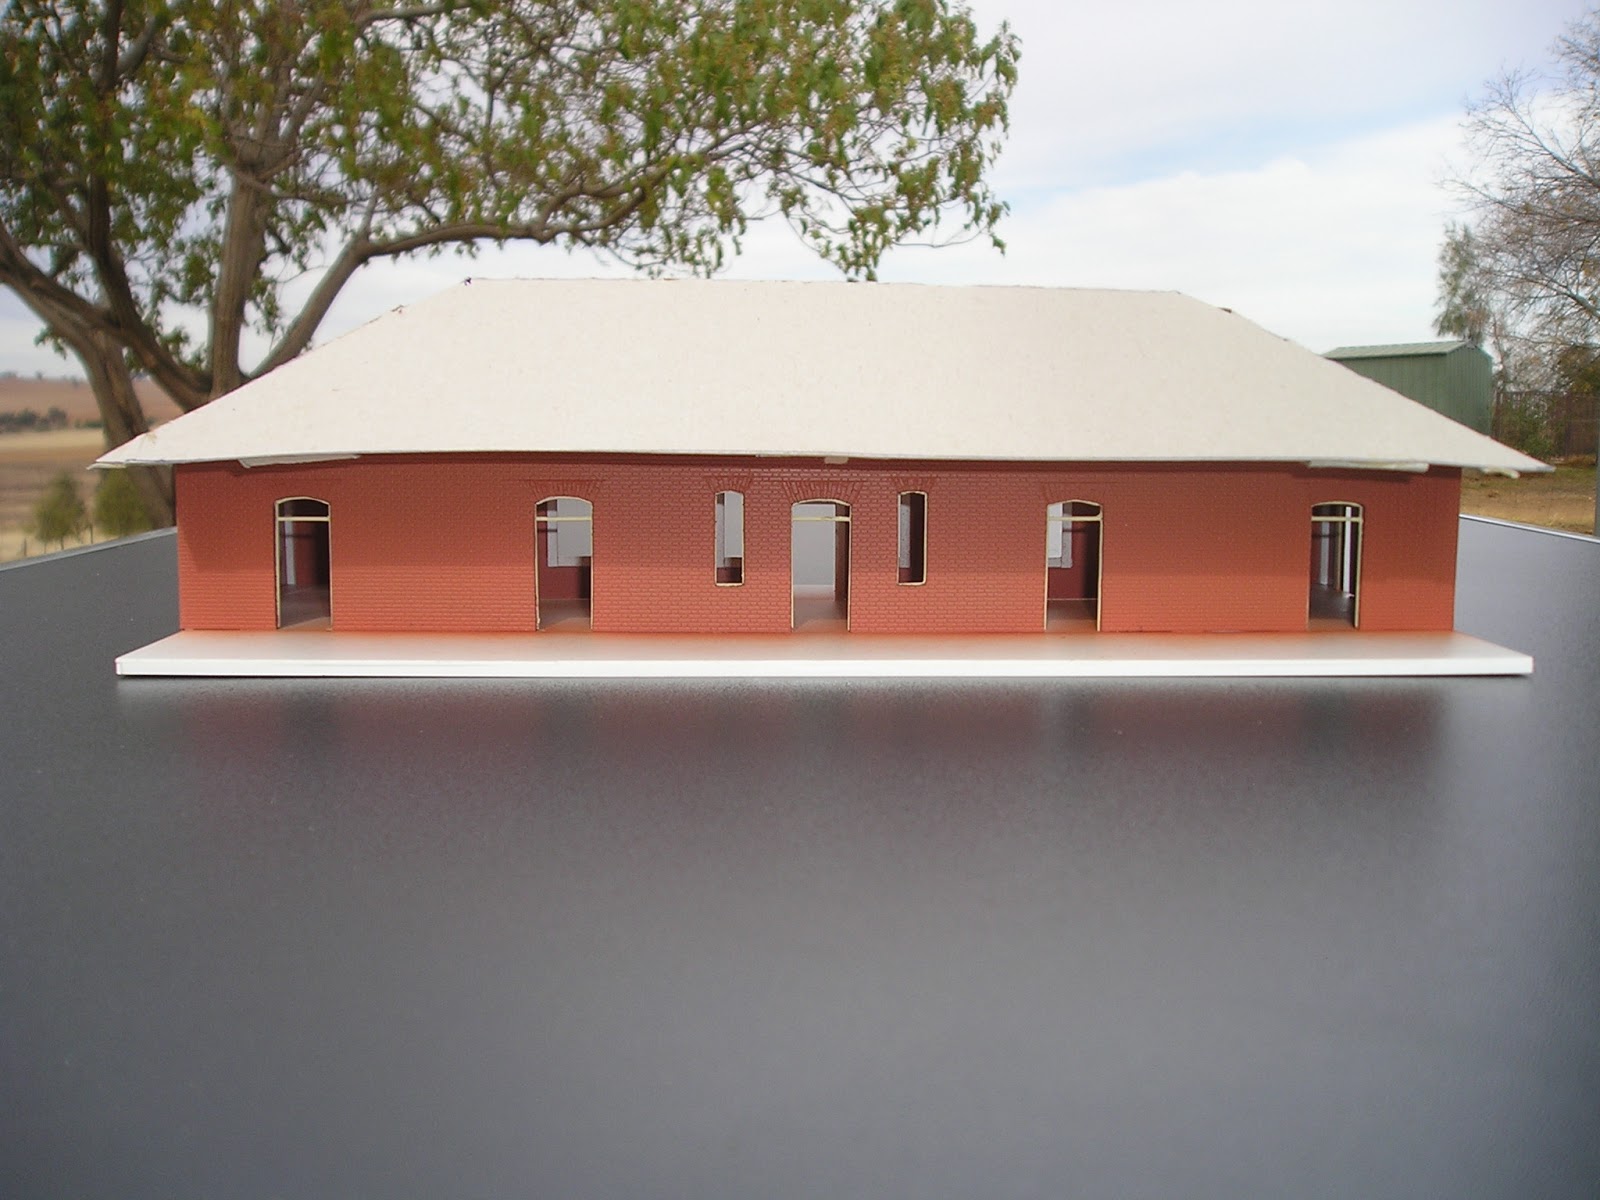
| Station front - again with cardboard roof. I might have to change my viewing perspective to see if the roof line matches the picture below |
 |
| The real Bomen station - hopefully my model will look close to this when finished |
Before stating on the posts, awnings, and roof, I thought I
would check out the cardboard roof made earlier, on my station. This is the last time for any changes before
starting to cut out more styrene.
In the meantime, I am trying to get some details on the
station interior. Having an open door,
and people will add some life to the station when completed. I have also made a start on the awning
supports posts, but you will all have to wait a little longer for this bit.
Happy modelling


Looking good Rob
ReplyDelete